
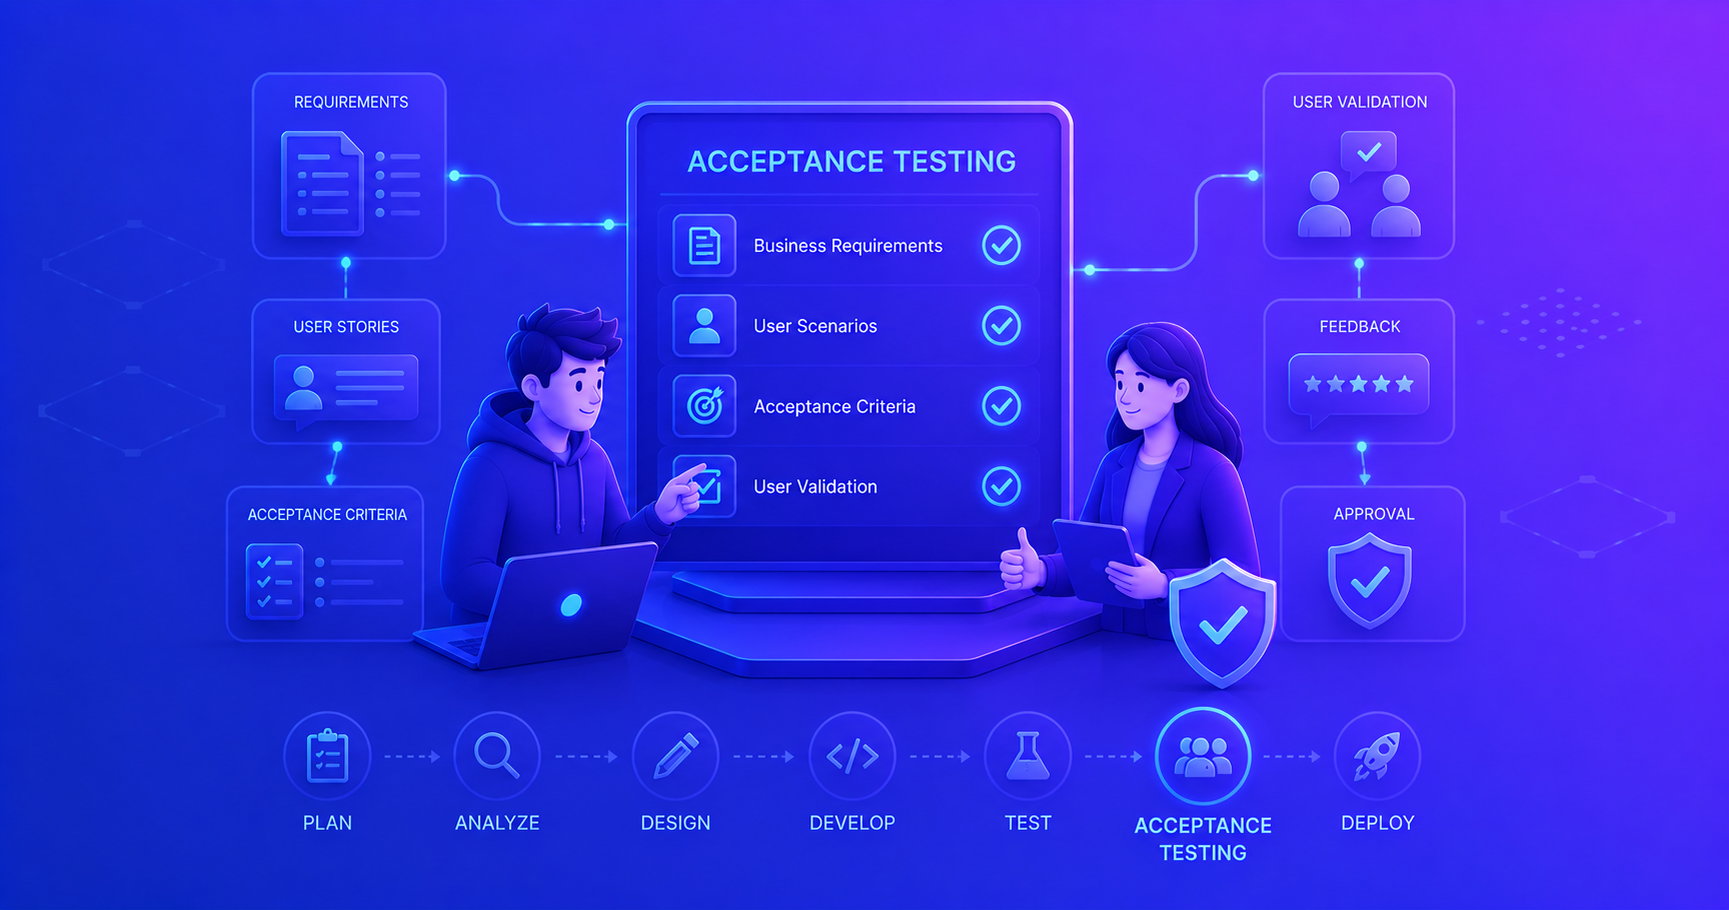
This post completes our testing series. If you’re new to testing concepts, start with Unit Testing and Integration Testing to build a solid foundation!
What Is Acceptance Testing?
Acceptance testing is the final phase of testing where you validate that the software meets business requirements and is ready for delivery to end users. Unlike unit and integration tests that focus on technical correctness, acceptance tests verify that the system delivers value and works as intended from the user’s perspective.
Think of acceptance testing like a final inspection before moving into a newly built house. The electrician tested the wiring (unit tests), the plumber checked that all fixtures work together (integration tests), but now you, the buyer, walk through to verify everything meets your expectations. Does the kitchen layout work for your needs? Are the bedrooms in the right places? This is acceptance testing: ensuring the product meets the buyer’s requirements.
Why Acceptance Testing Matters
Acceptance testing bridges the gap between technical implementation and business value:
- Validates business requirements: Confirms the software solves the intended problem
- Catches misunderstandings: Reveals gaps between what was built and what was needed
- Builds stakeholder confidence: Demonstrates the system works for real-world scenarios
- Reduces post-release defects: Catches issues before users encounter them
- Defines “done”: Provides clear criteria for feature completion
Pro Tip: Acceptance tests are written in business language, not technical jargon. They should be understandable by product owners, business analysts, and non-technical stakeholders.
The Testing Pyramid and Acceptance Tests
Understanding where acceptance testing fits in your overall testing strategy is crucial:
flowchart TB
    subgraph pyramid["Testing Pyramid"]
        direction TB
        AT[Acceptance Tests]
        IT[Integration Tests]
        UT[Unit Tests]

        UT -.->|More tests<br/>Faster execution<br/>Lower cost| IT
        IT -.-> AT
    end

    style AT fill:#ff6b6b
    style IT fill:#4ecdc4
    style UT fill:#95e1d3

    subgraph characteristics["Test Characteristics"]
        direction TB
        C1[Unit: Fast, Isolated, Many]
        C2[Integration: Medium speed, Component groups]
        C3[Acceptance: Slower, End-to-end, Fewer]
    end

    pyramid -.-> characteristics
Comparing Testing Levels
| Aspect | Unit Testing | Integration Testing | Acceptance Testing |
|---|---|---|---|
| Scope | Single method/class | Multiple components | Complete feature/user journey |
| Perspective | Developer/technical | Developer/technical | User/business |
| Dependencies | Mocked | Partially real | Real (or close to production) |
| Speed | Very fast (ms) | Moderate (seconds) | Slow (seconds to minutes) |
| Language | Code/technical | Code/technical | Business/user stories |
| Who writes | Developers | Developers | Developers + QA + Business |
| When run | During development | Before integration | Before release |
| Quantity | Thousands | Hundreds | Dozens |
The Testing Pyramid Principle
why you need more unit tests than acceptance tests.
The testing pyramid suggests you should have:
- Many unit tests (70-80%): Fast, cheap to maintain, pinpoint failures
- Fewer integration tests (15-20%): Verify key component interactions
- Even fewer acceptance tests (5-10%): Validate critical user journeys
This distribution balances coverage with execution speed and maintenance cost. Acceptance tests are powerful but expensive, they’re slow to run and brittle when UI or workflows change. Use them strategically for high-value scenarios, and let unit tests handle detailed logic verification.
Types of Acceptance Testing
Acceptance testing comes in several flavors, each serving different purposes:
1. User Acceptance Testing (UAT)
User Acceptance Testing is performed by actual end users or their representatives to verify the system meets their needs in real-world scenarios.
Example: Before launching an e-commerce checkout feature, actual shoppers test the entire purchase flow, adding items to cart, applying discount codes, entering payment information, and confirming orders.
sequenceDiagram
    participant User as End User
    participant System as Application
    participant QA as QA Team
    participant Dev as Development

    QA->>User: Provide test environment & scenarios
    User->>System: Execute real-world workflows
    System-->>User: System responses
    User->>QA: Report findings & feedback
    QA->>Dev: Document defects
    Dev->>System: Fix issues
    Dev->>QA: Deploy fixes
    QA->>User: Request retest
Characteristics:
- Conducted in a production-like environment
- Uses real business data (or sanitized production data)
- Focuses on business workflows, not technical details
- May be manual or assisted by test scripts
2. Business Acceptance Testing (BAT)
Business Acceptance Testing validates that the system meets business objectives and regulatory requirements. This is typically performed by business analysts or product owners.
Example: A banking application must comply with anti-money laundering (AML) regulations. Business acceptance testing verifies that transaction monitoring rules correctly flag suspicious activities according to legal requirements.
Focus areas:
- Business process compliance
- Regulatory requirements
- Business rules validation
- ROI and business value
3. Contract Acceptance Testing (CAT)
Contract Acceptance Testing verifies that delivered software meets contractual specifications. This is common in outsourcing or vendor relationships.
Example: A contract specifies that a reporting system must generate monthly financial reports in under 30 seconds for datasets up to 1 million records. Contract acceptance testing validates these performance criteria.
4. Operational Acceptance Testing (OAT)
Operational Acceptance Testing ensures the system is ready for production from an operations perspective, backups, disaster recovery, security, monitoring, and maintainability.
Example: Before deploying a new microservice, operations teams verify that:
- Health check endpoints work correctly
- Logs are properly formatted and sent to the logging system
- Metrics are exposed for monitoring
- Backup and restore procedures work
- Security scans pass
5. Alpha and Beta Testing
- Alpha Testing: Internal testing by employees who act as surrogate users
- Beta Testing: External testing by a select group of real users before public release
Example: A mobile app company releases a beta version to 1,000 volunteer users to gather feedback on usability, performance, and bugs before the official launch.
Acceptance Criteria and User Stories
Acceptance testing is driven by acceptance criteria, specific, measurable conditions that must be satisfied for a feature to be considered complete.
Structure of a User Story with Acceptance Criteria
1
2
3
4
5
6
7
8
As a [role]
I want to [action]
So that [benefit]

Acceptance Criteria:
- [Specific testable condition 1]
- [Specific testable condition 2]
- [Specific testable condition 3]
Real-World Example: Login Feature
1
2
3
4
5
6
7
8
9
10
11
12
13
14
User Story:
As a registered user
I want to log into the system with my email and password
So that I can access my account

Acceptance Criteria:
- User can enter email and password in respective fields
- Clicking "Login" with valid credentials redirects to dashboard
- Clicking "Login" with invalid credentials shows error message "Invalid email or password"
- Error message disappears when user starts typing
- Login form validates email format before submission
- Password field masks characters
- After 5 failed attempts, account is locked for 15 minutes
- "Remember me" checkbox keeps user logged in for 30 days
Pro Tip: Good acceptance criteria are SMART: Specific, Measurable, Achievable, Relevant, and Testable. Avoid vague statements like “system should be fast” and use specific metrics like “login completes within 2 seconds.”
Acceptance Testing in the SDLC
Acceptance testing integrates into the software development lifecycle at specific points:
flowchart LR
    REQ[Requirements<br/>Gathering] --> DESIGN[Design]
    DESIGN --> DEV[Development]
    DEV --> UT[Unit<br/>Testing]
    UT --> INT[Integration<br/>Testing]
    INT --> AT[Acceptance<br/>Testing]
    AT --> DEPLOY[Deployment]

    REQ -.->|Define acceptance<br/>criteria| AT
    AT -->|Pass| DEPLOY
    AT -->|Fail| DEV

    style AT fill:#ff6b6b
    style DEPLOY fill:#51cf66
When to Write Acceptance Tests
The timing of writing acceptance tests depends on your methodology:
Agile/Scrum
acceptance criteria defined during sprint planning.
In Agile environments, acceptance criteria are defined as part of user story refinement, typically before or during sprint planning. Tests may be written:
- Before development (Behavior-Driven Development)
- During development (Test-Driven Development)
- After development but before story completion
The key principle: No story is “done” until acceptance tests pass.
Waterfall
acceptance test planning during requirements phase.
In Waterfall, acceptance test plans are created during the requirements phase, detailing test scenarios, test data, and success criteria. Actual test execution occurs after integration testing, before final deployment.
Behavior-Driven Development (BDD)
tests written first in business language.
BDD takes acceptance testing to the next level by writing tests in a natural language format (Given-When-Then) before any code is written. These tests drive development and serve as living documentation.
Behavior-Driven Development and Gherkin
Behavior-Driven Development (BDD) is an approach that uses acceptance tests written in natural language to drive development. The most popular format is Gherkin, which uses a Given-When-Then structure.
Gherkin Syntax
1
2
3
4
5
6
7
8
9
10
11
12
13
14
15
16
17
18
19
20
21
22
23
24
25
26
27
28
Feature: User Login

  Scenario: Successful login with valid credentials
    Given the user is on the login page
    And the user has a registered account with email "user@example.com"
    When the user enters email "user@example.com"
    And the user enters password "SecurePass123"
    And the user clicks the "Login" button
    Then the user should be redirected to the dashboard
    And the user should see a welcome message "Welcome back, John!"

  Scenario: Failed login with invalid password
    Given the user is on the login page
    When the user enters email "user@example.com"
    And the user enters password "WrongPassword"
    And the user clicks the "Login" button
    Then the user should remain on the login page
    And an error message "Invalid email or password" should be displayed
    And the password field should be cleared

  Scenario: Account lockout after multiple failed attempts
    Given the user is on the login page
    And the user has failed to login 4 times
    When the user enters email "user@example.com"
    And the user enters password "WrongPassword"
    And the user clicks the "Login" button
    Then an error message "Account locked. Try again in 15 minutes" should be displayed
    And the login button should be disabled for 15 minutes
Components of Gherkin
- Feature: High-level description of the feature being tested
- Scenario: Specific test case or user journey
- Given: Preconditions or initial context
- When: Actions or events
- Then: Expected outcomes
- And/But: Additional steps in any section
Pro Tip: Gherkin scenarios should be written collaboratively by developers, testers, and business stakeholders. This ensures everyone understands what’s being built and how success is defined.
Automated Acceptance Testing with Cucumber
While acceptance tests can be manual, automating them saves time and enables continuous integration. Cucumber is a popular BDD framework that executes Gherkin scenarios.
Setting Up Cucumber in Java
1. Add Dependencies (Maven)
1
2
3
4
5
6
7
8
9
10
11
12
13
14
15
16
17
18
19
20
21
22
23
<dependencies>
    <!-- Cucumber -->
    <dependency>
        <groupId>io.cucumber</groupId>
        <artifactId>cucumber-java</artifactId>
        <version>7.14.0</version>
        <scope>test</scope>
    </dependency>
    <dependency>
        <groupId>io.cucumber</groupId>
        <artifactId>cucumber-junit</artifactId>
        <version>7.14.0</version>
        <scope>test</scope>
    </dependency>

    <!-- Selenium for browser automation -->
    <dependency>
        <groupId>org.seleniumhq.selenium</groupId>
        <artifactId>selenium-java</artifactId>
        <version>4.15.0</version>
        <scope>test</scope>
    </dependency>
</dependencies>
2. Create Feature File (src/test/resources/features/login.feature)
1
2
3
4
5
6
7
8
Feature: User Login

  Scenario: Successful login with valid credentials
    Given the user is on the login page
    When the user enters email "user@example.com"
    And the user enters password "SecurePass123"
    And the user clicks the login button
    Then the user should see the dashboard
3. Create Step Definitions (src/test/java/steps/LoginSteps.java)
1
2
3
4
5
6
7
8
9
10
11
12
13
14
15
16
17
18
19
20
21
22
23
24
25
26
27
28
29
30
31
32
33
34
35
36
37
38
39
40
41
42
package steps;

import io.cucumber.java.en.Given;
import io.cucumber.java.en.When;
import io.cucumber.java.en.Then;
import org.openqa.selenium.By;
import org.openqa.selenium.WebDriver;
import org.openqa.selenium.chrome.ChromeDriver;
import static org.junit.Assert.*;

public class LoginSteps {
    private WebDriver driver;

    @Given("the user is on the login page")
    public void userIsOnLoginPage() {
        driver = new ChromeDriver();
        driver.get("http://localhost:8080/login");
    }

    @When("the user enters email {string}")
    public void userEntersEmail(String email) {
        driver.findElement(By.id("email")).sendKeys(email);
    }

    @When("the user enters password {string}")
    public void userEntersPassword(String password) {
        driver.findElement(By.id("password")).sendKeys(password);
    }

    @When("the user clicks the login button")
    public void userClicksLoginButton() {
        driver.findElement(By.id("loginBtn")).click();
    }

    @Then("the user should see the dashboard")
    public void userShouldSeeDashboard() {
        String currentUrl = driver.getCurrentUrl();
        assertTrue("Expected dashboard URL",
                   currentUrl.contains("/dashboard"));
        driver.quit();
    }
}
4. Create Test Runner (src/test/java/runners/TestRunner.java)
1
2
3
4
5
6
7
8
9
10
11
12
13
14
15
16
package runners;

import io.cucumber.junit.Cucumber;
import io.cucumber.junit.CucumberOptions;
import org.junit.runner.RunWith;

@RunWith(Cucumber.class)
@CucumberOptions(
    features = "src/test/resources/features",
    glue = "steps",
    plugin = {"pretty", "html:target/cucumber-reports.html"},
    monochrome = true
)
public class TestRunner {
    // This class remains empty - it's just a runner
}
Running the Tests
1
2
3
4
5
# Run with Maven
mvn test

# Run specific feature
mvn test -Dcucumber.options="src/test/resources/features/login.feature"
REST API Acceptance Testing
Not all acceptance tests involve UI automation. For APIs, you validate that endpoints meet business requirements.
Example: E-commerce Order API
Gherkin Feature:
1
2
3
4
5
6
7
8
9
10
11
12
13
14
15
16
17
18
19
20
21
Feature: Order Management API

  Scenario: Successfully create an order
    Given the customer has items in their cart
    And the customer is authenticated
    When the customer submits an order with the following details:
      | item_id | quantity | price |
      | 101     | 2        | 29.99 |
      | 205     | 1        | 49.99 |
    Then the order should be created successfully
    And the response status should be 201
    And the order should have a unique order ID
    And the total amount should be 109.97
    And an order confirmation email should be sent

  Scenario: Reject order with invalid payment method
    Given the customer has items in their cart
    When the customer submits an order with payment method "INVALID_CARD"
    Then the order should be rejected
    And the response status should be 400
    And the error message should be "Invalid payment method"
Step Definitions for API Testing:
1
2
3
4
5
6
7
8
9
10
11
12
13
14
15
16
17
18
19
20
21
22
23
24
25
26
27
28
29
30
31
32
33
34
35
36
37
38
39
40
41
42
43
44
45
46
47
48
49
50
51
52
53
54
55
56
57
58
59
60
61
62
63
64
65
66
67
68
69
70
71
72
73
74
75
76
77
78
79
80
81
82
83
package steps;

import io.cucumber.java.en.*;
import io.restassured.RestAssured;
import io.restassured.response.Response;
import static io.restassured.RestAssured.*;
import static org.hamcrest.Matchers.*;

public class OrderApiSteps {
    private Response response;
    private String authToken;
    private double expectedTotal;

    @Given("the customer is authenticated")
    public void customerIsAuthenticated() {
        // Obtain authentication token
        response = given()
            .contentType("application/json")
            .body("{\"username\":\"testuser\",\"password\":\"test123\"}")
            .when()
            .post("http://localhost:8080/api/auth/login");

        authToken = response.jsonPath().getString("token");
    }

    @Given("the customer has items in their cart")
    public void customerHasItemsInCart() {
        // Add items to cart via API
        given()
            .header("Authorization", "Bearer " + authToken)
            .contentType("application/json")
            .body("{\"itemId\":101,\"quantity\":2}")
            .when()
            .post("http://localhost:8080/api/cart/add");
    }

    @When("the customer submits an order with the following details:")
    public void customerSubmitsOrder(io.cucumber.datatable.DataTable dataTable) {
        // Calculate expected total
        expectedTotal = 0;
        var items = dataTable.asMaps();
        for (var item : items) {
            int quantity = Integer.parseInt(item.get("quantity"));
            double price = Double.parseDouble(item.get("price"));
            expectedTotal += quantity * price;
        }

        // Submit order
        response = given()
            .header("Authorization", "Bearer " + authToken)
            .contentType("application/json")
            .body("{\"items\":" + dataTable.toString() + "}")
            .when()
            .post("http://localhost:8080/api/orders");
    }

    @Then("the order should be created successfully")
    public void orderShouldBeCreated() {
        response.then().statusCode(201);
    }

    @Then("the response status should be {int}")
    public void responseStatusShouldBe(int statusCode) {
        response.then().statusCode(statusCode);
    }

    @Then("the order should have a unique order ID")
    public void orderShouldHaveUniqueId() {
        response.then().body("orderId", notNullValue());
        response.then().body("orderId", matchesPattern("^ORD-\\d+$"));
    }

    @Then("the total amount should be {double}")
    public void totalAmountShouldBe(double expectedAmount) {
        response.then().body("totalAmount", equalTo((float) expectedAmount));
    }

    @Then("an order confirmation email should be sent")
    public void confirmationEmailShouldBeSent() {
        // Verify email was queued (could check database or message queue)
        response.then().body("emailStatus", equalTo("SENT"));
    }
}
Pro Tip: Use REST Assured library for API testing in Java, it provides a fluent, readable syntax for HTTP requests and response validation.
Practical Example: Complete E-Commerce Checkout Flow
Let’s see a complete acceptance test for an e-commerce checkout process:
Feature File
1
2
3
4
5
6
7
8
9
10
11
12
13
14
15
16
17
18
19
20
21
22
23
24
25
26
27
28
29
30
31
32
33
34
35
36
37
38
39
40
41
42
43
44
45
46
47
48
49
50
51
52
53
54
55
56
57
Feature: E-Commerce Checkout Process

  Background:
    Given the following products are available:
      | product_id | name           | price | stock |
      | 1          | Laptop         | 999   | 10    |
      | 2          | Wireless Mouse | 29    | 50    |
      | 3          | USB Cable      | 9     | 100   |
    And the customer "john@example.com" is logged in

  Scenario: Complete successful checkout
    Given the customer has added the following items to cart:
      | product_id | quantity |
      | 1          | 1        |
      | 2          | 2        |
    When the customer proceeds to checkout
    And the customer enters shipping address:
      | field    | value           |
      | street   | 123 Main St     |
      | city     | Springfield     |
      | state    | IL              |
      | zip      | 62701           |
    And the customer selects "Standard Shipping" ($5.99)
    And the customer enters payment details:
      | card_number      | 4111111111111111 |
      | expiry           | 12/25            |
      | cvv              | 123              |
    And the customer clicks "Place Order"
    Then the order should be created successfully
    And the order confirmation page should display:
      | field        | value    |
      | subtotal     | $1057.00 |
      | shipping     | $5.99    |
      | tax          | $84.56   |
      | total        | $1147.55 |
    And an order confirmation email should be sent to "john@example.com"
    And the product stock should be updated:
      | product_id | new_stock |
      | 1          | 9         |
      | 2          | 48        |

  Scenario: Checkout fails with insufficient stock
    Given the product "1" has only 0 items in stock
    And the customer has added product "1" to cart
    When the customer proceeds to checkout
    Then the checkout should fail
    And an error message "Product 'Laptop' is out of stock" should be displayed
    And the customer should be redirected to the cart page

  Scenario: Checkout fails with invalid credit card
    Given the customer has added product "2" to cart
    When the customer proceeds to checkout
    And the customer enters invalid credit card "1234567890123456"
    And the customer clicks "Place Order"
    Then the payment should be rejected
    And an error message "Invalid credit card number" should be displayed
    And the order should not be created
Key Observations
Notice how this acceptance test:
- Tests complete user journey: From cart to order confirmation
- Uses business language: “proceeds to checkout”, not “POST /api/checkout”
- Validates multiple aspects: UI display, data persistence, side effects (stock updates, emails)
- Covers happy and unhappy paths: Success and various failure scenarios
- Uses data tables: For clarity and maintainability
- Includes Background: Common setup for multiple scenarios
Common Pitfalls and Best Practices
❌ Common Mistakes
Too Many Acceptance Tests
acceptance tests should be selective, not exhaustive.
Problem: Creating acceptance tests for every possible scenario makes the test suite slow and brittle.
Solution: Focus acceptance tests on critical user journeys and business-critical scenarios. Use unit and integration tests for detailed edge case validation.
Example: Don’t write 50 acceptance tests for every validation rule on a form. Write one or two acceptance tests for the happy path and key error scenarios, and use unit tests for all 50 validation rules.
Testing Through the UI Only
over-reliance on UI automation creates fragile tests.
Problem: UI-based acceptance tests are slow and break easily when UI changes, even if functionality remains correct.
Solution: Use a layered approach:
- Test business logic with unit tests
- Test API contracts with API-level acceptance tests
- Reserve UI tests for genuine end-to-end user journeys
Poor Test Data Management
tests fail due to data issues, not functionality problems.
Problem: Tests depend on specific data that may not exist or may be modified by other tests.
Solution: Each test should:
- Create its own test data (or use fixtures)
- Clean up after itself
- Not depend on execution order
- Use unique identifiers to avoid collisions
Vague Acceptance Criteria
unclear criteria lead to ambiguous tests.
Problem: “The system should be user-friendly” or “Performance should be good” are not testable.
Solution: Use specific, measurable criteria:
- ❌ “System should be fast”
- ✅ “Login completes within 2 seconds for 95% of requests”
- ❌ “Error messages should be helpful”
- ✅ “Error messages identify the field with the error and explain what input is expected”
✅ Best Practices
Write Acceptance Criteria First: Before writing any code, define what “done” means
Collaborate on Scenarios: Include developers, testers, and business stakeholders in writing Gherkin scenarios
Keep Scenarios Independent: Each scenario should be able to run independently in any order
Use Descriptive Names: Scenario names should clearly describe the business situation
Test Business Value, Not Implementation: Focus on what the system does for users, not how it does it
Maintain Test Data: Use fixtures, database seeds, or API calls to set up consistent test data
Run Tests in CI/CD: Automate acceptance tests to run before deployment
Monitor Test Execution Time: If tests become too slow, optimize or move some to lower levels
Use Page Object Pattern: For UI tests, abstract page interactions into reusable page objects
1
2
3
4
5
6
7
8
9
10
11
12
13
14
15
16
17
18
19
20
21
22
23
24
25
26
27
28
29
30
31
32
33
34
35
// Page Object Pattern Example
public class LoginPage {
    private WebDriver driver;

    public LoginPage(WebDriver driver) {
        this.driver = driver;
    }

    public void enterEmail(String email) {
        driver.findElement(By.id("email")).sendKeys(email);
    }

    public void enterPassword(String password) {
        driver.findElement(By.id("password")).sendKeys(password);
    }

    public void clickLogin() {
        driver.findElement(By.id("loginBtn")).click();
    }

    public DashboardPage login(String email, String password) {
        enterEmail(email);
        enterPassword(password);
        clickLogin();
        return new DashboardPage(driver);
    }
}

// Usage in Step Definition
@When("the user logs in with valid credentials")
public void userLogsInWithValidCredentials() {
    LoginPage loginPage = new LoginPage(driver);
    DashboardPage dashboard = loginPage.login("user@example.com", "SecurePass123");
    // Continue with dashboard verification
}
Pro Tip: The Page Object Pattern makes UI tests more maintainable. When the UI changes, you update one page object instead of dozens of test scenarios.
Tools and Frameworks for Acceptance Testing
For Java Applications
| Tool | Type | Best For |
|---|---|---|
| Cucumber | BDD Framework | Writing tests in Gherkin, collaboration with non-technical stakeholders |
| JBehave | BDD Framework | Alternative to Cucumber with Java-centric approach |
| Selenium WebDriver | UI Automation | Browser-based acceptance tests |
| REST Assured | API Testing | REST API acceptance tests with fluent syntax |
| TestNG/JUnit | Test Framework | Running and organizing acceptance tests |
| Serenity BDD | BDD + Reporting | Cucumber integration with excellent reporting |
For Other Contexts
- Cypress: Modern JavaScript-based E2E testing framework
- Playwright: Cross-browser automation for modern web apps
- Postman: Manual and automated API testing
- JMeter: Performance and load testing acceptance criteria
- FitNesse: Wiki-based acceptance testing (less common now)
When to Apply Acceptance Testing
✅ Use Acceptance Testing For:
- Critical user journeys: Login, checkout, payment processing
- Regulatory compliance: Features that must meet legal requirements
- Business-critical features: Core functionality that drives business value
- Integration points: Where your system interacts with external services
- Complex workflows: Multi-step processes with many decision points
❌ Don’t Use Acceptance Testing For:
- Simple utility functions: Test these with unit tests
- Internal APIs: Unless they’re customer-facing
- Every edge case: Use unit tests for detailed validation
- Rapidly changing UIs: Too brittle; use component tests instead
Acceptance Testing in Agile Teams
In Agile/Scrum environments, acceptance testing is integrated into the Definition of Done:
Definition of Done Checklist
1
2
3
4
5
6
7
☑ Code written and reviewed
☑ Unit tests written and passing
☑ Integration tests written and passing
☑ Acceptance tests written and passing
☑ Documentation updated
☑ Code merged to main branch
☑ Product Owner has reviewed and accepted the feature
Three Amigos Meeting
The “Three Amigos” (Developer, Tester, Product Owner) meet to discuss each user story before development begins:
flowchart LR
    PO[Product Owner<br/>What needs to be built]
    DEV[Developer<br/>How it will be built]
    QA[Tester<br/>How it will be tested]

    PO <-->|Discuss<br/>requirements| DEV
    DEV <-->|Discuss<br/>testability| QA
    QA <-->|Clarify<br/>acceptance criteria| PO

    PO --> AC[Agreed Acceptance<br/>Criteria]
    DEV --> AC
    QA --> AC

    AC --> GHERKIN[Gherkin Scenarios]
This collaboration ensures everyone understands what’s being built and how success will be measured.
Real-World Example: Banking Transfer Feature
Let’s put it all together with a realistic banking feature:
User Story
1
2
3
4
5
6
7
8
9
10
11
12
13
As a bank customer
I want to transfer money between my accounts
So that I can manage my finances efficiently

Acceptance Criteria:
1. Customer can select source and destination accounts from dropdown
2. Customer can enter transfer amount
3. System validates sufficient funds in source account
4. System prevents transfers exceeding daily limit ($10,000)
5. Transfer executes immediately and updates both account balances
6. Customer sees confirmation with transaction reference number
7. Transfer appears in transaction history for both accounts
8. Email notification sent to customer's registered email
Gherkin Scenarios
1
2
3
4
5
6
7
8
9
10
11
12
13
14
15
16
17
18
19
20
21
22
23
24
25
26
27
28
29
30
31
32
33
34
35
36
37
38
39
40
41
42
43
44
45
46
47
48
49
50
51
52
53
54
55
56
57
58
59
Feature: Internal Account Transfer

  Background:
    Given the customer "Alice Johnson" is logged in
    And the customer has the following accounts:
      | account_number | type     | balance   |
      | 1234567890     | Checking | 5000.00   |
      | 0987654321     | Savings  | 10000.00  |

  Scenario: Successful transfer between accounts
    Given the customer is on the transfer page
    When the customer selects source account "1234567890"
    And the customer selects destination account "0987654321"
    And the customer enters transfer amount "1000.00"
    And the customer clicks "Transfer Now"
    Then the transfer should be successful
    And the confirmation page should display:
      | field              | value              |
      | amount             | $1,000.00          |
      | from               | Checking (x7890)   |
      | to                 | Savings (x4321)    |
      | reference_number   | matches TXN\d{10}  |
      | date               | today's date       |
    And the account balances should be updated:
      | account_number | new_balance |
      | 1234567890     | 4000.00     |
      | 0987654321     | 11000.00    |
    And a confirmation email should be sent to the customer
    And the transaction should appear in both accounts' history

  Scenario: Transfer fails with insufficient funds
    Given the customer is on the transfer page
    When the customer selects source account "1234567890"
    And the customer selects destination account "0987654321"
    And the customer enters transfer amount "6000.00"
    And the customer clicks "Transfer Now"
    Then the transfer should fail
    And an error message should display "Insufficient funds. Available balance: $5,000.00"
    And the account balances should remain unchanged
    And no email should be sent

  Scenario: Transfer fails when exceeding daily limit
    Given the customer has already transferred $9,500 today
    And the customer is on the transfer page
    When the customer selects source account "0987654321"
    And the customer selects destination account "1234567890"
    And the customer enters transfer amount "1000.00"
    And the customer clicks "Transfer Now"
    Then the transfer should fail
    And an error message should display "Daily transfer limit exceeded. Remaining limit: $500.00"

  Scenario: Transfer fails to same account
    Given the customer is on the transfer page
    When the customer selects source account "1234567890"
    And the customer selects destination account "1234567890"
    And the customer enters transfer amount "100.00"
    And the customer clicks "Transfer Now"
    Then the transfer should fail
    And an error message should display "Cannot transfer to the same account"
Step Definitions (Partial)
1
2
3
4
5
6
7
8
9
10
11
12
13
14
15
16
17
18
19
20
21
22
23
24
25
26
27
28
29
30
31
32
33
34
35
36
37
38
39
40
41
42
43
44
45
46
47
48
49
50
51
52
53
54
55
56
57
58
59
60
61
62
63
64
65
66
67
68
69
70
71
72
73
74
75
76
77
78
79
80
81
82
83
84
85
86
87
88
89
90
91
92
93
94
95
96
97
98
99
100
101
102
103
104
105
106
107
108
109
110
111
112
113
114
115
116
117
118
119
120
121
122
123
124
package steps;

import io.cucumber.java.en.*;
import pages.TransferPage;
import pages.ConfirmationPage;
import static org.junit.Assert.*;

public class TransferSteps {
    private TransferPage transferPage;
    private ConfirmationPage confirmationPage;
    private String transactionReference;

    @Given("the customer {string} is logged in")
    public void customerIsLoggedIn(String customerName) {
        // Login logic using API or UI
        AuthHelper.login(customerName);
    }

    @Given("the customer has the following accounts:")
    public void customerHasAccounts(io.cucumber.datatable.DataTable dataTable) {
        // Setup test data in database
        TestDataHelper.createAccounts(dataTable);
    }

    @Given("the customer is on the transfer page")
    public void customerIsOnTransferPage() {
        transferPage = new TransferPage(driver);
        transferPage.navigate();
    }

    @When("the customer selects source account {string}")
    public void selectSourceAccount(String accountNumber) {
        transferPage.selectSourceAccount(accountNumber);
    }

    @When("the customer selects destination account {string}")
    public void selectDestinationAccount(String accountNumber) {
        transferPage.selectDestinationAccount(accountNumber);
    }

    @When("the customer enters transfer amount {string}")
    public void enterTransferAmount(String amount) {
        transferPage.enterAmount(amount);
    }

    @When("the customer clicks {string}")
    public void clickButton(String buttonText) {
        if (buttonText.equals("Transfer Now")) {
            confirmationPage = transferPage.clickTransferButton();
        }
    }

    @Then("the transfer should be successful")
    public void transferShouldBeSuccessful() {
        assertTrue("Expected confirmation page to be displayed",
                   confirmationPage.isDisplayed());
        assertFalse("Should not show error messages",
                    confirmationPage.hasErrors());
    }

    @Then("the confirmation page should display:")
    public void verifyConfirmationDetails(io.cucumber.datatable.DataTable dataTable) {
        var expectedData = dataTable.asMap(String.class, String.class);

        for (var entry : expectedData.entrySet()) {
            String field = entry.getKey();
            String expectedValue = entry.getValue();
            String actualValue = confirmationPage.getFieldValue(field);

            if (expectedValue.startsWith("matches ")) {
                String pattern = expectedValue.replace("matches ", "");
                assertTrue(
                    String.format("Field '%s' should match pattern '%s', got '%s'",
                                  field, pattern, actualValue),
                    actualValue.matches(pattern)
                );
                // Store for later verification
                if (field.equals("reference_number")) {
                    transactionReference = actualValue;
                }
            } else {
                assertEquals(
                    String.format("Field '%s' mismatch", field),
                    expectedValue,
                    actualValue
                );
            }
        }
    }

    @Then("the account balances should be updated:")
    public void verifyAccountBalances(io.cucumber.datatable.DataTable dataTable) {
        var expectedBalances = dataTable.asMap(String.class, String.class);

        for (var entry : expectedBalances.entrySet()) {
            String accountNumber = entry.getKey();
            double expectedBalance = Double.parseDouble(entry.getValue());
            double actualBalance = AccountRepository.getBalance(accountNumber);

            assertEquals(
                String.format("Balance mismatch for account %s", accountNumber),
                expectedBalance,
                actualBalance,
                0.01
            );
        }
    }

    @Then("a confirmation email should be sent to the customer")
    public void verifyEmailSent() {
        // Check email queue or mock email service
        assertTrue("Confirmation email should be sent",
                   EmailService.wasEmailSent(transactionReference));
    }

    @Then("the transaction should appear in both accounts' history")
    public void verifyTransactionHistory() {
        // Verify transaction records in database or via API
        assertTrue("Transaction should appear in source account history",
                   TransactionRepository.existsForAccount("1234567890", transactionReference));
        assertTrue("Transaction should appear in destination account history",
                   TransactionRepository.existsForAccount("0987654321", transactionReference));
    }
}
Summary
Acceptance testing is the bridge between technical implementation and business value. Here’s what you should remember:
Key Takeaways
Purpose: Acceptance testing validates that software meets business requirements and user expectations
Perspective: Tests are written from the user’s viewpoint using business language
Types: UAT, BAT, CAT, OAT each serve different validation purposes
Timing: Acceptance tests define “done”, no feature is complete until they pass
BDD/Gherkin: Given-When-Then format enables collaboration and serves as living documentation
Automation: Tools like Cucumber, Selenium, and REST Assured enable continuous validation
Strategic Use: Focus on critical paths; don’t try to test everything at the acceptance level
Collaboration: Best results come from developers, testers, and business stakeholders working together
The Testing Strategy
Remember the testing pyramid:
- Many unit tests for detailed logic validation (fast, cheap)
- Moderate integration tests for component interactions
- Fewer acceptance tests for critical user journeys (slow, expensive)
Each level serves a purpose, use them together for comprehensive quality assurance.
Final Tip: Start writing acceptance criteria before coding. When you know what “done” looks like, you’re more likely to build the right thing the first time.
Next Steps
Now that you understand acceptance testing, continue building your testing expertise:
- Practice writing Gherkin scenarios for features you’re working on
- Set up Cucumber in a sample project and automate some acceptance tests
- Participate in “Three Amigos” meetings with your team
- Explore end-to-end testing frameworks like Selenium and Cypress
- Learn about performance testing and load testing for non-functional acceptance criteria
Testing is a critical skill that distinguishes professional developers from amateurs. Master acceptance testing, and you’ll deliver software that truly meets user needs.