
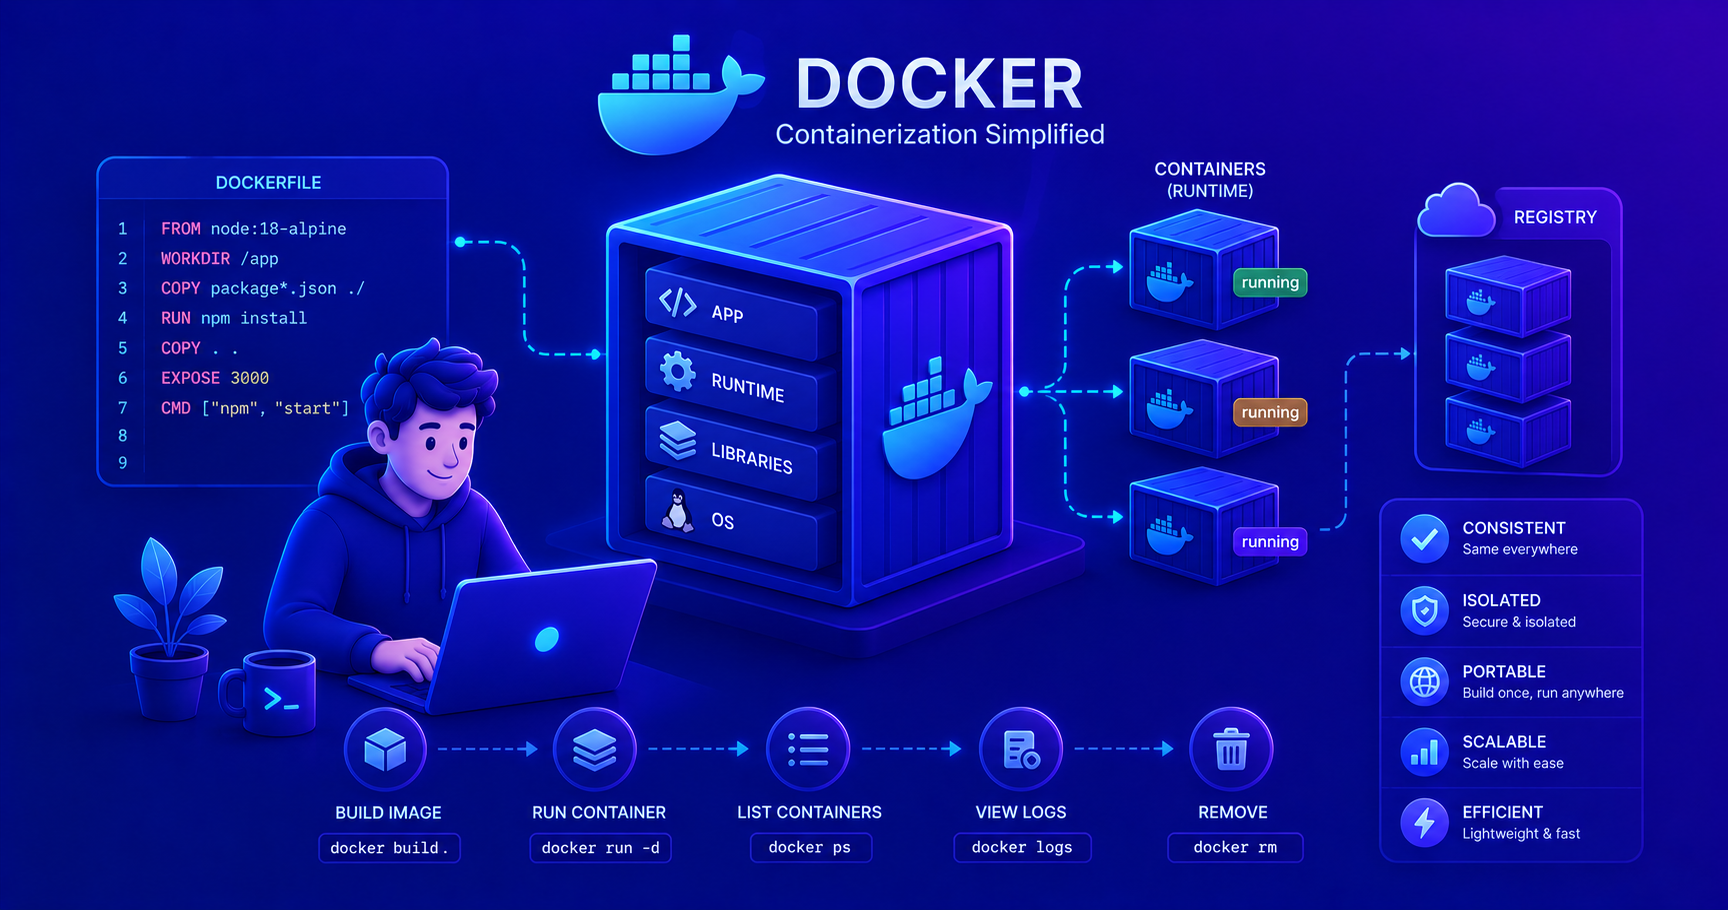
This post introduces Docker and containerization concepts. Understanding basic command-line operations and having familiarity with application deployment will help you get the most out of this guide!
What is Docker?
Imagine you’ve built an amazing application on your laptop. It works perfectly. Then you try to run it on your colleague’s machine or deploy it to a server, and suddenly: “But it works on my machine!”
This is where Docker comes to the rescue. Docker is a platform that packages your application and all its dependencies into a standardized unit called a container. This container runs the same way everywhere, on your laptop, your teammate’s computer, or in production.
Why Containerization Matters
Containerization solves several critical problems in software development:
- Consistency - Same environment from development to production
- Isolation - Applications don’t interfere with each other
- Portability - Run anywhere Docker is installed
- Efficiency - Lightweight and fast to start
- Scalability - Easy to replicate and scale applications
"I remember spending hours debugging why my Python application worked locally but crashed in production. The culprit? Different library versions. Docker would have saved me days of frustration."
Core Docker Concepts
Before diving into commands and examples, let’s understand the fundamental building blocks of Docker.
Container
A running instance of your application with all dependencies.
A container is a lightweight, standalone executable package that includes everything needed to run a piece of software: code, runtime, system tools, libraries, and settings. Containers are isolated from each other and the host system, but share the OS kernel.
Key characteristics:
- Ephemeral (can be stopped and started)
- Isolated (has its own filesystem, network, process space)
- Lightweight (shares OS kernel, no full OS needed)
- Fast to start (seconds, not minutes)
Image
A blueprint or template for creating containers.
An image is a read-only template with instructions for creating a container. Think of it as a snapshot or a class definition (if you’re thinking OOP). Images are built from a Dockerfile and can be stored in registries.
Key characteristics:
- Immutable (doesn’t change)
- Layered (built in layers for efficiency)
- Versioned (tagged with versions like
app:1.0,app:latest) - Shareable (pushed to and pulled from registries)
Dockerfile
A text file with instructions to build a Docker image.
A Dockerfile contains a series of commands that Docker executes to create an image. It specifies the base image, copies files, installs dependencies, sets environment variables, and defines what command runs when a container starts.
Registry
A storage and distribution system for Docker images.
A Docker registry is like GitHub for Docker images. The most popular public registry is Docker Hub. Organizations often run private registries for their images.
Docker vs Virtual Machines
Understanding the difference between Docker containers and virtual machines (VMs) is crucial:
| Aspect | Docker Container | Virtual Machine |
|---|---|---|
| Size | Megabytes | Gigabytes |
| Startup Time | Seconds | Minutes |
| Resource Usage | Shares host OS kernel | Full OS per VM |
| Isolation | Process-level | Hardware-level |
| Portability | High | Medium |
| Performance | Near-native | Overhead from hypervisor |
flowchart TB
    subgraph VM["Virtual Machine Architecture"]
        direction TB
        HW1[Hardware]
        HOST1[Host OS]
        HYP[Hypervisor]
        VM1[Guest OS]
        VM2[Guest OS]
        APP1[App A]
        APP2[App B]

        HW1 --> HOST1
        HOST1 --> HYP
        HYP --> VM1
        HYP --> VM2
        VM1 --> APP1
        VM2 --> APP2
    end

    subgraph DOCKER["Docker Architecture"]
        direction TB
        HW2[Hardware]
        HOST2[Host OS]
        DENGINE[Docker Engine]
        C1[Container A]
        C2[Container B]

        HW2 --> HOST2
        HOST2 --> DENGINE
        DENGINE --> C1
        DENGINE --> C2
    end
Important: Containers share the host OS kernel, making them much lighter than VMs. However, this means Linux containers need a Linux kernel (though Docker Desktop provides this on Windows/Mac).
Basic Docker Workflow
Here’s the typical development workflow with Docker:
flowchart LR
    DF[Write Dockerfile]
    BUILD[Build Image]
    RUN[Run Container]
    TEST[Test Application]
    PUSH[Push to Registry]
    DEPLOY[Deploy/Pull]

    DF --> BUILD
    BUILD --> RUN
    RUN --> TEST
    TEST --> |Success| PUSH
    TEST --> |Issues| DF
    PUSH --> DEPLOY
The Development Cycle
- Write a Dockerfile defining your application environment
- Build an image from the Dockerfile
- Run a container from the image
- Test your application in the container
- Push the image to a registry
- Deploy by pulling the image on target servers
Essential Docker Commands
Let’s explore the commands you’ll use daily as a Docker developer.
Image Management
1
2
3
4
5
6
7
8
9
10
11
12
13
14
15
16
17
# Pull an image from Docker Hub
docker pull nginx:latest

# List all images on your system
docker images

# Build an image from a Dockerfile
docker build -t myapp:1.0 .

# Tag an image
docker tag myapp:1.0 myusername/myapp:1.0

# Push an image to a registry
docker push myusername/myapp:1.0

# Remove an image
docker rmi myapp:1.0
Container Management
1
2
3
4
5
6
7
8
9
10
11
12
13
14
15
16
17
18
19
20
21
22
23
# Run a container from an image
docker run -d -p 8080:80 --name webserver nginx

# List running containers
docker ps

# List all containers (including stopped)
docker ps -a

# Stop a running container
docker stop webserver

# Start a stopped container
docker start webserver

# Remove a container
docker rm webserver

# View container logs
docker logs webserver

# Execute a command in running container
docker exec -it webserver bash
Pro Tip: The
-dflag runs containers in detached mode (background), and-itprovides an interactive terminal.
Command Breakdown
Let’s understand a common docker run command:
1
docker run -d -p 8080:80 -v /host/path:/container/path --name myapp -e ENV_VAR=value myapp:1.0
| Flag | Purpose | Example Value |
|---|---|---|
-d | Detached mode (background) | - |
-p | Port mapping (host:container) | 8080:80 |
-v | Volume mount (data persistence) | /host/path:/container/path |
--name | Container name | myapp |
-e | Environment variable | ENV_VAR=value |
| Last argument | Image name and tag | myapp:1.0 |
Creating a Dockerfile for Java Applications
Let’s create a Dockerfile for a Java Spring Boot application. This is a practical example you’ll use frequently.
Simple Java Application Dockerfile
1
2
3
4
5
6
7
8
9
10
11
12
13
14
# Start from official Java base image
FROM eclipse-temurin:17-jre

# Set working directory inside container
WORKDIR /app

# Copy the JAR file from build output
COPY target/myapp.jar app.jar

# Expose the port your app runs on
EXPOSE 8080

# Command to run when container starts
ENTRYPOINT ["java", "-jar", "app.jar"]
Multi-Stage Build Dockerfile (Best Practice)
A multi-stage build compiles your application inside Docker, ensuring consistent builds:
1
2
3
4
5
6
7
8
9
10
11
12
13
14
15
16
17
18
19
20
21
22
23
24
25
26
27
28
29
30
31
32
33
34
# Stage 1: Build the application
FROM maven:3.9-eclipse-temurin-17 AS builder

WORKDIR /build

# Copy dependency files first (for layer caching)
COPY pom.xml .
RUN mvn dependency:go-offline

# Copy source code and build
COPY src ./src
RUN mvn clean package -DskipTests

# Stage 2: Create runtime image
FROM eclipse-temurin:17-jre-alpine

WORKDIR /app

# Copy only the built artifact from builder stage
COPY --from=builder /build/target/*.jar app.jar

# Create non-root user for security
RUN addgroup -S spring && adduser -S spring -G spring
USER spring:spring

# Expose port
EXPOSE 8080

# Health check
HEALTHCHECK --interval=30s --timeout=3s --start-period=40s \
  CMD wget --quiet --tries=1 --spider http://localhost:8080/actuator/health || exit 1

# Run the application
ENTRYPOINT ["java", "-jar", "app.jar"]
Why multi-stage builds? They keep your final image small by excluding build tools (Maven, source code) that aren’t needed at runtime.
Building and Running Your Java App
1
2
3
4
5
6
7
8
9
10
11
12
13
14
# Build the image
docker build -t my-spring-app:1.0 .

# Run the container
docker run -d -p 8080:8080 --name spring-app my-spring-app:1.0

# Check if it's running
docker ps

# View logs
docker logs -f spring-app

# Test the application
curl http://localhost:8080/actuator/health
Docker Compose for Multi-Container Applications
Real applications often need multiple services: your app, a database, a cache, etc. Docker Compose lets you define and run multi-container applications with a single configuration file.
Docker Compose Architecture
flowchart TB
    COMPOSE[docker-compose.yml]

    subgraph Services
        APP[Spring Boot App<br/>Port: 8080]
        DB[(PostgreSQL<br/>Port: 5432)]
        REDIS[Redis Cache<br/>Port: 6379]
    end

    subgraph Network
        NETWORK[Docker Network<br/>Services can communicate]
    end

    COMPOSE --> APP
    COMPOSE --> DB
    COMPOSE --> REDIS

    APP -.->|connects to| DB
    APP -.->|connects to| REDIS

    APP --> NETWORK
    DB --> NETWORK
    REDIS --> NETWORK
Example: Spring Boot + PostgreSQL
Create a docker-compose.yml file in your project root:
1
2
3
4
5
6
7
8
9
10
11
12
13
14
15
16
17
18
19
20
21
22
23
24
25
26
27
28
29
30
31
32
33
34
35
36
37
38
39
version: '3.8'

services:
  # Spring Boot application
  app:
    build: .
    ports:
      - "8080:8080"
    environment:
      - SPRING_DATASOURCE_URL=jdbc:postgresql://db:5432/myappdb
      - SPRING_DATASOURCE_USERNAME=appuser
      - SPRING_DATASOURCE_PASSWORD=securepassword
    depends_on:
      - db
    networks:
      - app-network
    restart: unless-stopped

  # PostgreSQL database
  db:
    image: postgres:15-alpine
    environment:
      - POSTGRES_DB=myappdb
      - POSTGRES_USER=appuser
      - POSTGRES_PASSWORD=securepassword
    volumes:
      - postgres-data:/var/lib/postgresql/data
    ports:
      - "5432:5432"
    networks:
      - app-network
    restart: unless-stopped

networks:
  app-network:
    driver: bridge

volumes:
  postgres-data:
Docker Compose Commands
1
2
3
4
5
6
7
8
9
10
11
12
13
14
15
16
17
18
19
20
# Start all services
docker-compose up -d

# View running services
docker-compose ps

# View logs from all services
docker-compose logs -f

# View logs from specific service
docker-compose logs -f app

# Stop all services
docker-compose down

# Stop and remove volumes (data)
docker-compose down -v

# Rebuild and restart services
docker-compose up -d --build
Important: Volumes persist data even when containers are removed. The
postgres-datavolume ensures your database survives restarts.
Key Docker Compose Concepts
Services
Each container definition in your application.
Services are the building blocks of your application. Each service runs in its own container. In the example above, we have two services: app and db.
Networks
Allow services to communicate with each other.
Docker Compose automatically creates a network for your services. Services can reach each other using their service name as hostname. For example, the app connects to the database using db:5432.
Volumes
Persist data beyond container lifecycle.
Volumes are used to store data that should survive container restarts. Database data, uploaded files, and application logs are commonly stored in volumes.
depends_on
Control startup order of services.
The depends_on directive ensures that the database starts before the application. However, it only waits for the container to start, not for the database to be fully ready.
Best Practices for Container Development
Following these best practices will help you create efficient, secure, and maintainable Docker containers.
1. Keep Images Small
1
2
3
4
5
6
7
8
# ❌ Bad: Using full JDK
FROM eclipse-temurin:17

# ✅ Good: Using JRE (smaller)
FROM eclipse-temurin:17-jre

# ✅ Even better: Using Alpine variant
FROM eclipse-temurin:17-jre-alpine
Why? Smaller images mean faster builds, faster deployments, and reduced attack surface.
2. Use Layer Caching Effectively
1
2
3
4
5
6
7
8
9
# ❌ Bad: Copy everything first
COPY . .
RUN mvn clean package

# ✅ Good: Copy dependencies first
COPY pom.xml .
RUN mvn dependency:go-offline
COPY src ./src
RUN mvn clean package
Why? Docker caches each layer. If dependencies haven’t changed, Docker reuses the cached layer instead of re-downloading everything.
3. Run as Non-Root User
1
2
3
4
5
6
7
8
# Create a non-root user
RUN addgroup -S appgroup && adduser -S appuser -G appgroup

# Switch to non-root user
USER appuser:appgroup

# Now commands run as appuser
ENTRYPOINT ["java", "-jar", "app.jar"]
Why? Running as root is a security risk. If an attacker compromises your container, they shouldn’t have root privileges.
Security Tip: Always run containers as non-root users in production environments.
4. Use .dockerignore File
Create a .dockerignore file in your project root:
1
2
3
4
5
6
7
8
9
10
11
12
13
14
15
16
17
18
19
20
# Build output
target/
build/

# IDE files
.idea/
.vscode/
*.iml

# Git
.git/
.gitignore

# Documentation
README.md
docs/

# Environment files
.env
.env.local
Why? Prevents unnecessary files from being copied into the image, reducing build time and image size.
5. Use Environment Variables for Configuration
1
2
3
4
5
6
# In Dockerfile
ENV APP_PORT=8080
ENV DB_HOST=localhost

# Or pass at runtime
docker run -e DB_HOST=production-db myapp:1.0
Why? Makes your images reusable across different environments (dev, staging, production).
6. Add Health Checks
1
2
HEALTHCHECK --interval=30s --timeout=3s --start-period=40s --retries=3 \
  CMD curl -f http://localhost:8080/health || exit 1
Why? Docker can automatically restart unhealthy containers, improving reliability.
7. Use Specific Image Tags
1
2
3
4
5
# ❌ Bad: Using latest tag
FROM openjdk:latest

# ✅ Good: Using specific version
FROM eclipse-temurin:17-jre-alpine
Why? latest tag can change, breaking your builds. Specific versions ensure reproducibility.
Common Pitfalls for Beginners
Let’s address mistakes that junior engineers commonly make with Docker.
Pitfall 1: Not Understanding Container Lifecycle
1
2
3
4
5
6
7
# This creates a NEW container each time
docker run myapp:1.0  # Creates container 1
docker run myapp:1.0  # Creates container 2
docker run myapp:1.0  # Creates container 3

# Instead, start existing containers
docker start container-name
Remember:
docker runcreates a new container.docker startstarts an existing stopped container.
Pitfall 2: Losing Data When Container Stops
1
2
3
4
5
# ❌ Without volume: Data is lost when container is removed
docker run postgres:15

# ✅ With volume: Data persists
docker run -v postgres-data:/var/lib/postgresql/data postgres:15
Pitfall 3: Port Confusion
1
2
3
4
5
6
# Format: -p HOST_PORT:CONTAINER_PORT
docker run -p 8080:80 nginx

# This means:
# - nginx listens on port 80 INSIDE the container
# - You access it on port 8080 on your HOST machine
Pitfall 4: Not Cleaning Up
Docker can fill up your disk with unused images and containers:
1
2
3
4
5
6
7
8
9
10
11
# Remove stopped containers
docker container prune

# Remove unused images
docker image prune

# Remove unused volumes
docker volume prune

# Remove everything unused (nuclear option)
docker system prune -a
Pro Tip: Run
docker system pruneperiodically to keep your system clean.
Pitfall 5: Hardcoding Configuration
1
2
3
4
5
# ❌ Bad: Hardcoded values
ENV DB_PASSWORD=mysecretpassword

# ✅ Good: Use at runtime
# docker run -e DB_PASSWORD=$SECURE_PASSWORD myapp
Pitfall 6: Ignoring Build Context Size
1
2
3
4
5
6
7
# If you run docker build from wrong directory
docker build -t myapp /

# This copies your ENTIRE filesystem as build context!
# Always build from project directory
cd /path/to/project
docker build -t myapp .
Practical Exercise: Complete Workflow
Let’s put everything together with a complete example. Here’s a step-by-step workflow for a Java Spring Boot application.
Project Structure
1
2
3
4
5
6
7
8
9
10
myapp/
├── src/
│   └── main/
│       ├── java/
│       └── resources/
│           └── application.yml
├── pom.xml
├── Dockerfile
├── docker-compose.yml
└── .dockerignore
Step 1: Update application.yml
1
2
3
4
5
6
7
8
9
10
11
12
spring:
  datasource:
    url: ${SPRING_DATASOURCE_URL:jdbc:postgresql://localhost:5432/myappdb}
    username: ${SPRING_DATASOURCE_USERNAME:appuser}
    password: ${SPRING_DATASOURCE_PASSWORD:password}
  jpa:
    hibernate:
      ddl-auto: update
    show-sql: true

server:
  port: ${APP_PORT:8080}
Step 2: Build and Test
1
2
3
4
5
6
7
8
9
10
11
12
13
14
15
16
17
# Build the image
docker build -t myapp:1.0 .

# Run with docker-compose (app + database)
docker-compose up -d

# Check if everything is running
docker-compose ps

# View logs
docker-compose logs -f app

# Test the application
curl http://localhost:8080/api/hello

# Stop everything
docker-compose down
Step 3: Push to Registry
1
2
3
4
5
6
7
8
# Login to Docker Hub
docker login

# Tag the image
docker tag myapp:1.0 yourusername/myapp:1.0

# Push to registry
docker push yourusername/myapp:1.0
When to Use Docker
Docker is not always the answer. Here’s when it shines:
| Use Docker When | Consider Alternatives When |
|---|---|
| You need consistent environments | Simple single-file scripts |
| Multiple services need to work together | Desktop GUI applications |
| You’re deploying to cloud/Kubernetes | Very low-level system programming |
| Team members use different OS | Learning basic programming concepts |
| You need to scale horizontally | Single-developer simple projects |
Advice: Start using Docker early in your career. It’s becoming a fundamental skill, and hands-on experience is the best teacher.
Docker Workflow Summary
flowchart TD
    START[Start Development]
    WRITE[Write Application Code]
    DOCKERFILE[Create Dockerfile]
    BUILD[docker build]
    TEST[Test Locally]
    COMPOSE[Set up docker-compose.yml]
    MULTITEST[Test Multi-Container Setup]
    TAG[Tag Image]
    PUSH[Push to Registry]
    DEPLOY[Deploy to Production]

    START --> WRITE
    WRITE --> DOCKERFILE
    DOCKERFILE --> BUILD
    BUILD --> TEST
    TEST --> |Issues| WRITE
    TEST --> |Works| COMPOSE
    COMPOSE --> MULTITEST
    MULTITEST --> |Issues| COMPOSE
    MULTITEST --> |Works| TAG
    TAG --> PUSH
    PUSH --> DEPLOY
Conclusion
Docker revolutionizes how we build, ship, and run applications. As a Junior engineer, mastering Docker gives you:
- Consistency across all environments
- Faster development with ready-to-use containers
- Better collaboration with standardized setups
- Production-ready skills for modern DevOps practices
Key takeaways:
- Containers are lightweight, portable, and isolated
- Images are blueprints; containers are running instances
- Dockerfiles define how to build images
- Docker Compose orchestrates multi-container applications
- Always use volumes for data persistence
- Follow best practices: small images, non-root users, specific tags
- Clean up regularly to avoid disk space issues
Next steps:
- Build a Dockerfile for your current project
- Set up Docker Compose for a full-stack application
- Practice essential Docker commands daily
- Explore Docker Hub for official images
- Learn about Docker networking and volumes in depth
Remember: Docker has a learning curve, but the investment pays off quickly. Start with simple examples, experiment often, and don’t be afraid to break things in your local environment, that’s how you learn!
Happy containerizing! 🐳