
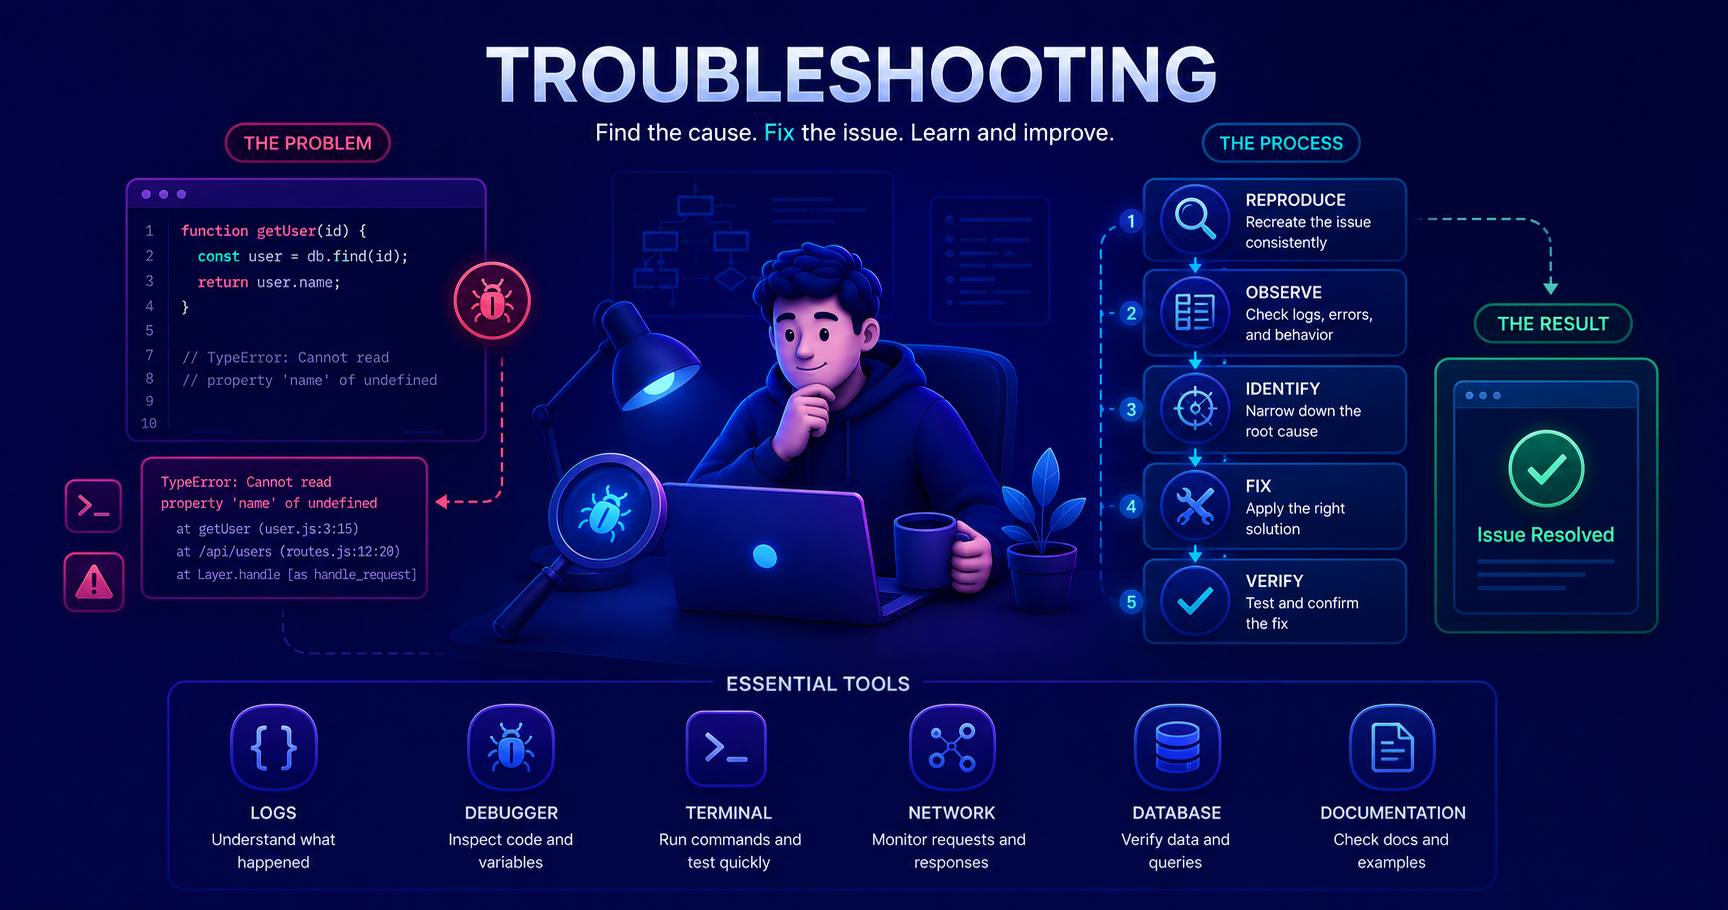
This post introduces troubleshooting fundamentals for software development. If you’re new to programming or need a refresher on reading error messages, this guide will help you develop systematic debugging skills!
What Is Troubleshooting?
Troubleshooting is the systematic process of diagnosing and resolving problems in software systems. In software development, troubleshooting, often called debugging, involves identifying why code doesn’t behave as expected and implementing fixes to restore correct functionality.
According to TechTarget’s definition, troubleshooting is “a form of problem solving, often applied to repair failed products or processes on a machine or a system.” In our context, we apply scientific methods and logical reasoning to locate and eliminate bugs in our code.
Think of troubleshooting like being a detective investigating a crime scene. You don’t randomly accuse suspects, you gather evidence, form hypotheses, test theories, and systematically eliminate possibilities until you identify the culprit. The same approach applies to finding bugs in your code.
Why Troubleshooting Skills Matter
As a junior developer, strong troubleshooting skills are essential because:
- Bugs are inevitable: Even experienced developers write buggy code
- You’ll spend significant time debugging: Studies show developers spend 35-50% of their time finding and fixing bugs
- Efficiency matters: Good troubleshooting skills save hours of frustration
- Problem-solving is core to development: Debugging teaches you to think critically about code
- Career advancement: Developers who can independently solve problems are highly valued
Pro Tip: The best developers aren’t those who write bug-free code (that’s impossible), but those who can quickly and systematically identify and fix issues.
The Troubleshooting Methodology
Effective troubleshooting follows a systematic approach rather than random trial and error. Here’s the proven four-step methodology:
flowchart TB
    Start([Bug Discovered]) --> Reproduce[1. Reproduce the Issue]
    Reproduce --> Isolate[2. Isolate the Root Cause]
    Isolate --> Fix[3. Implement the Fix]
    Fix --> Verify[4. Verify the Solution]
    Verify --> Test{Does it work?}
    Test -->|Yes| Document[Document & Close]
    Test -->|No| Reproduce
    Document --> End([Issue Resolved])

    style Start fill:#ffe6e6
    style End fill:#e6ffe6
    style Test fill:#fff4e6
Let’s explore each step in detail:
1. Reproduce the Issue
Reproduction means making the bug happen consistently so you can observe it and test potential fixes.
Why it matters: If you can’t reproduce a bug reliably, you can’t be sure you’ve fixed it. Random bugs are often the hardest to solve, but finding the pattern makes them manageable.
How to do it:
- Document the exact steps that trigger the bug
- Note the environment (OS, Java version, dependencies)
- Identify any patterns (specific input values, timing, data states)
- Create a minimal test case that demonstrates the problem
1
2
3
4
5
6
7
8
9
10
11
12
13
14
15
16
17
18
// Example: Bug reported - "Calculator crashes on division"
// Step 1: Try to reproduce consistently

public class Calculator {
    public double divide(int a, int b) {
        return a / b;  // Bug: What happens when b is 0?
    }

    public static void main(String[] args) {
        Calculator calc = new Calculator();

        // Test case 1: Normal division
        System.out.println(calc.divide(10, 2));  // Works: 5.0

        // Test case 2: Division by zero
        System.out.println(calc.divide(10, 0));  // Reproduced! ArithmeticException
    }
}
Advanced Reproduction Technique
When bugs seem random or intermittent.
Some bugs only appear under specific conditions. Here’s how to hunt them down:
- Log everything: Add detailed logging to track program state
- Vary one factor at a time: Change input data, timing, load, etc.
- Check for race conditions: Multi-threaded bugs may need stress testing
- Environment differences: Compare working vs. broken environments
Example: A bug that only occurs “sometimes” might be related to:
- Uninitialized variables with random values
- Timing dependencies in concurrent code
- External state (cached data, file system state)
- Input data edge cases you haven’t considered
2. Isolate the Root Cause
Isolation means narrowing down exactly where and why the problem occurs. This is the detective work phase.
Debugging strategies:
A. The Scientific Method
Form a hypothesis about what’s causing the bug, test it, and refine based on evidence.
1
2
3
4
5
6
7
8
9
10
11
12
13
14
15
16
17
// Example: NullPointerException in user service
public class UserService {
    private DatabaseConnection db;

    public User getUser(String username) {
        // Hypothesis 1: username is null?
        System.out.println("Username: " + username);  // Debug print

        // Hypothesis 2: db connection is null?
        System.out.println("DB is null: " + (db == null));  // Debug print

        // The crash happens here
        return db.findUser(username);  // NullPointerException!

        // Evidence: db is null! Root cause found.
    }
}
B. Divide and Conquer
Split your code into sections and test each part to find where the bug lives.
flowchart TB
    Full[Full Program Has Bug] --> Split[Split in Half]
    Split --> First[Test First Half]
    Split --> Second[Test Second Half]
    First --> FirstOK{Bug Found?}
    Second --> SecondOK{Bug Found?}
    FirstOK -->|No| Done1[This half is OK]
    FirstOK -->|Yes| Divide1[Divide this half again]
    SecondOK -->|No| Done2[This half is OK]
    SecondOK -->|Yes| Divide2[Divide this half again]
    Divide1 --> First
    Divide2 --> Second

    style Full fill:#ffe6e6
    style Done1 fill:#e6ffe6
    style Done2 fill:#e6ffe6
C. Reading Stack Traces
Stack traces are your best friend, they tell you exactly where the error occurred and how you got there.
1
2
3
4
5
6
7
8
9
10
11
12
13
14
public class StackTraceExample {
    public static void main(String[] args) {
        processUser();
    }

    public static void processUser() {
        String name = getUserName();
        System.out.println(name.toUpperCase());  // Bug here!
    }

    public static String getUserName() {
        return null;  // Oops! Returns null
    }
}
Stack trace output:
1
2
3
4
Exception in thread "main" java.lang.NullPointerException:
    Cannot invoke "String.toUpperCase()" because "name" is null
    at StackTraceExample.processUser(StackTraceExample.java:9)
    at StackTraceExample.main(StackTraceExample.java:3)
How to read it:
- Exception type:
NullPointerExceptiontells you what went wrong - Error message: “because ‘name’ is null” explains the specific problem
- Location:
StackTraceExample.java:9shows the exact line - Call stack: Shows the sequence of method calls leading to the error
Pro Tip: Always read stack traces from top to bottom. The top line shows where the exception occurred, while lines below show how your code got there.
3. Implement the Fix
Once you’ve identified the root cause, implement a fix. But don’t just patch the symptom, address the underlying problem.
1
2
3
4
5
6
7
8
9
10
11
12
13
14
15
16
17
18
19
20
21
22
23
24
25
26
// BAD FIX: Suppressing the symptom
public double divide(int a, int b) {
    try {
        return a / b;
    } catch (ArithmeticException e) {
        return 0;  // Hides the problem!
    }
}

// GOOD FIX: Addressing the root cause
public double divide(int a, int b) {
    if (b == 0) {
        throw new IllegalArgumentException(
            "Division by zero is not allowed. Divisor cannot be 0."
        );
    }
    return (double) a / b;
}

// EVEN BETTER: Provide meaningful default or handle gracefully
public Optional<Double> divide(int a, int b) {
    if (b == 0) {
        return Optional.empty();  // Caller decides how to handle
    }
    return Optional.of((double) a / b);
}
4. Verify the Solution
Verification ensures your fix actually solves the problem without breaking anything else.
Verification checklist:
- ✅ Does the original bug no longer occur?
- ✅ Do all existing tests still pass?
- ✅ Have you added a test for this specific bug?
- ✅ Have you tested edge cases?
- ✅ Have you tested in different environments?
1
2
3
4
5
6
7
8
9
10
11
12
13
14
15
16
17
18
// Add a unit test to prevent regression
@Test
public void testDivisionByZero() {
    Calculator calc = new Calculator();

    // Verify the fix handles division by zero correctly
    assertThrows(IllegalArgumentException.class, () -> {
        calc.divide(10, 0);
    });
}

@Test
public void testNormalDivision() {
    Calculator calc = new Calculator();

    // Verify we didn't break normal functionality
    assertEquals(5.0, calc.divide(10, 2), 0.001);
}
Pro Tip: Always add a test that would have caught the bug. This prevents the same bug from returning in the future (regression).
Essential Debugging Tools and Techniques
IDE Debugger
Modern IDEs like IntelliJ IDEA and Eclipse have powerful debuggers that let you pause execution and inspect program state.
Key debugger features:
| Feature | Purpose | When to Use |
|---|---|---|
| Breakpoints | Pause execution at a specific line | When you know approximately where the bug is |
| Step Over | Execute current line, move to next | To follow the flow line by line |
| Step Into | Enter into method calls | To investigate what happens inside a method |
| Step Out | Exit current method | To return to the calling method |
| Watch Variables | Monitor variable values | To see how data changes during execution |
| Conditional Breakpoints | Pause only when condition is true | To catch bugs that occur with specific values |
| Evaluate Expression | Run code in debug context | To test hypotheses without modifying code |
1
2
3
4
5
6
7
8
9
10
11
12
13
14
15
16
17
18
19
20
21
public class DebuggerExample {
    public static void main(String[] args) {
        int sum = 0;

        for (int i = 0; i < 10; i++) {
            sum += calculate(i);  // Set breakpoint here

            // In debugger, you can:
            // - Inspect value of 'i' and 'sum'
            // - Step into calculate() method
            // - Add conditional breakpoint: i == 5
            // - Evaluate expression: sum * 2
        }

        System.out.println("Total: " + sum);
    }

    public static int calculate(int n) {
        return n * n;  // Step into to see this execution
    }
}
Debugger Workflow Example
Walking through a real debugging session.
Scenario: A method is returning incorrect values for certain inputs.
- Set a breakpoint at the method entry
- Run in debug mode with problematic input
- Step through line by line, watching variables
- Identify where the value becomes incorrect
- Form hypothesis about why it’s wrong
- Test fix by modifying code and re-running
- Verify with multiple test cases
This systematic approach is much faster than adding print statements everywhere!
Logging
Logging provides a record of program execution that you can review to understand what happened.
1
2
3
4
5
6
7
8
9
10
11
12
13
14
15
16
17
18
19
20
21
22
23
24
25
26
27
28
29
30
31
32
33
34
35
import java.util.logging.Logger;
import java.util.logging.Level;

public class LoggingExample {
    private static final Logger logger = Logger.getLogger(LoggingExample.class.getName());

    public void processOrder(Order order) {
        logger.info("Processing order: " + order.getId());

        try {
            validateOrder(order);
            logger.info("Order validated successfully");

            calculateTotal(order);
            logger.info("Total calculated: " + order.getTotal());

            submitOrder(order);
            logger.info("Order submitted successfully");

        } catch (ValidationException e) {
            logger.log(Level.SEVERE, "Order validation failed", e);
            throw e;
        }
    }

    private void validateOrder(Order order) {
        logger.fine("Validating order items: " + order.getItems().size());

        if (order.getItems().isEmpty()) {
            logger.warning("Order has no items!");
            throw new ValidationException("Order must contain at least one item");
        }
        // More validation...
    }
}
Log levels (from least to most severe):
FINE/DEBUG: Detailed diagnostic informationINFO: General informational messagesWARNING: Potential issues that aren’t errorsSEVERE/ERROR: Serious problems that need attention
Warning: Don’t log sensitive data like passwords, credit cards, or personal information!
Print Debugging (Quick and Dirty)
Sometimes the simplest approach works best, strategic System.out.println() statements.
1
2
3
4
5
6
7
8
9
10
11
12
13
14
15
16
17
18
public int findMax(int[] numbers) {
    System.out.println("Input array length: " + numbers.length);  // Check input

    int max = numbers[0];
    System.out.println("Initial max: " + max);  // Check initialization

    for (int i = 1; i < numbers.length; i++) {
        System.out.println("Comparing " + max + " with " + numbers[i]);  // Check logic

        if (numbers[i] > max) {
            max = numbers[i];
            System.out.println("New max: " + max);  // Track changes
        }
    }

    System.out.println("Final max: " + max);  // Check result
    return max;
}
When to use print debugging:
- ✅ Quick investigation of variable values
- ✅ When debugger isn’t available (production systems)
- ✅ To understand program flow
- ❌ Don’t rely on it for complex bugs
- ❌ Remember to remove debug prints before committing!
Common Troubleshooting Scenarios
Scenario 1: The Mysterious Null Pointer
Problem: NullPointerException when processing user data
1
2
3
4
5
6
public class UserProcessor {
    public String formatUserInfo(User user) {
        // Crash! NullPointerException
        return user.getName().toUpperCase() + " - " + user.getEmail().toLowerCase();
    }
}
Troubleshooting steps:
- Reproduce: Call with various User objects
- Isolate: Add checks to find which value is null
1
2
3
4
5
6
7
8
9
public String formatUserInfo(User user) {
    System.out.println("User is null: " + (user == null));
    if (user != null) {
        System.out.println("Name is null: " + (user.getName() == null));
        System.out.println("Email is null: " + (user.getEmail() == null));
    }
    // Now we know which one is null!
    return user.getName().toUpperCase() + " - " + user.getEmail().toLowerCase();
}
- Fix: Add null checks with meaningful error handling
1
2
3
4
5
6
7
8
9
10
public String formatUserInfo(User user) {
    if (user == null) {
        throw new IllegalArgumentException("User cannot be null");
    }

    String name = user.getName() != null ? user.getName() : "Unknown";
    String email = user.getEmail() != null ? user.getEmail() : "no-email@example.com";

    return name.toUpperCase() + " - " + email.toLowerCase();
}
- Verify: Add unit tests for null cases
Scenario 2: Off-by-One Error
Problem: Loop processes one too many or too few elements
1
2
3
4
5
6
public void printArray(int[] arr) {
    // Bug: IndexOutOfBoundsException
    for (int i = 0; i <= arr.length; i++) {
        System.out.println(arr[i]);
    }
}
Troubleshooting:
flowchart LR
    A[Loop Condition] --> B{i <= length?}
    B -->|i=0| C[arr-0: OK]
    B -->|i=1| D[arr-1: OK]
    B -->|i=2| E[arr-2: OK]
    B -->|i=3| F[arr-3: CRASH!]

    style F fill:#ffe6e6

    G[Fixed: i < length] --> H{i < length?}
    H -->|i=0| I[arr-0: OK]
    H -->|i=1| J[arr-1: OK]
    H -->|i=2| K[arr-2: OK]
    H -->|i=3| L[Stop: Success]

    style L fill:#e6ffe6
The fix:
1
2
3
4
5
6
public void printArray(int[] arr) {
    // Fixed: Use < instead of <=
    for (int i = 0; i < arr.length; i++) {
        System.out.println(arr[i]);
    }
}
Scenario 3: Logic Error in Business Rules
Problem: Discount calculation gives wrong results for certain orders
1
2
3
4
5
6
7
8
9
10
11
12
13
14
15
public class DiscountCalculator {
    public double calculateDiscount(double orderTotal, boolean isPremiumCustomer) {
        double discount = 0;

        // Bug: Logic is incorrect!
        if (orderTotal > 100 || isPremiumCustomer) {
            discount = 0.10;  // 10% discount
        }
        if (orderTotal > 500 || isPremiumCustomer) {
            discount = 0.20;  // 20% discount
        }

        return orderTotal * discount;
    }
}
Troubleshooting with test cases:
1
2
3
4
5
6
7
8
9
10
11
12
13
14
15
@Test
public void testDiscountLogic() {
    DiscountCalculator calc = new DiscountCalculator();

    // Test case 1: Small order, regular customer
    assertEquals(0, calc.calculateDiscount(50, false), 0.01);

    // Test case 2: Medium order, regular customer
    assertEquals(15, calc.calculateDiscount(150, false), 0.01);  // Expected: 15 (10% of 150)

    // Test case 3: Large order, regular customer
    assertEquals(100, calc.calculateDiscount(500, false), 0.01);  // Bug found! Getting 100 instead of 50

    // Issue: OR logic should be AND for premium, and conditions should be else-if
}
The fix:
1
2
3
4
5
6
7
8
9
10
11
12
13
14
public double calculateDiscount(double orderTotal, boolean isPremiumCustomer) {
    double discountRate = 0;

    // Fixed: Clear, correct logic
    if (isPremiumCustomer && orderTotal > 500) {
        discountRate = 0.25;  // 25% for premium customers with large orders
    } else if (isPremiumCustomer || orderTotal > 500) {
        discountRate = 0.20;  // 20% for premium customers OR large orders
    } else if (orderTotal > 100) {
        discountRate = 0.10;  // 10% for medium orders
    }

    return orderTotal * discountRate;
}
Bad Debugging Habits to Avoid
| Bad Habit | Why It’s Bad | Better Approach |
|---|---|---|
| Random code changes | “Try this and see if it works” wastes time and can introduce new bugs | Form a hypothesis first, make targeted changes |
| Not reproducing consistently | Can’t verify your fix actually works | Always reproduce before attempting a fix |
| Fixing symptoms, not causes | The bug will return in a different form | Find and fix the root cause |
| Skipping tests | Your fix might break something else | Run full test suite after every fix |
| Not documenting findings | You’ll forget what you learned | Keep notes on what caused the bug |
| Changing multiple things at once | Can’t tell which change fixed it | Change one thing at a time |
| Ignoring error messages | Messages contain valuable clues | Read the full error message and stack trace |
| Not asking for help | Spending days on something a colleague could explain in minutes | Ask for help after 30 minutes of being stuck |
Warning: The most dangerous debugging habit is assuming you know what’s wrong without investigating. Always let evidence guide you, not assumptions!
Systematic Troubleshooting Decision Tree
flowchart TB
    Start([Bug Reported]) --> Reproduce{Can you<br/>reproduce it?}

    Reproduce -->|No| Gather[Gather more info:<br/>- Environment<br/>- Steps<br/>- Data state]
    Gather --> Reproduce

    Reproduce -->|Yes| Error{Getting an<br/>error message?}

    Error -->|Yes| Stack[Read stack trace<br/>Identify exact line]
    Error -->|No| Wrong[Identify what's<br/>wrong vs expected]

    Stack --> Debugger[Use debugger at<br/>the error line]
    Wrong --> Debugger

    Debugger --> State[Inspect program state:<br/>- Variables<br/>- Method calls<br/>- Data flow]

    State --> Cause{Root cause<br/>identified?}

    Cause -->|No| Divide[Divide and conquer:<br/>Test smaller sections]
    Divide --> State

    Cause -->|Yes| Implement[Implement fix]

    Implement --> Test[Run tests:<br/>- Bug fixed?<br/>- No regression?]

    Test -->|Failed| Cause
    Test -->|Passed| Document[Document:<br/>- What caused it<br/>- How you fixed it<br/>- Add test case]

    Document --> Close([Issue Resolved])

    style Start fill:#ffe6e6
    style Close fill:#e6ffe6
    style Cause fill:#fff4e6
    style Test fill:#fff4e6
Pro Tips for Efficient Troubleshooting
Tip 1: The Rubber Duck Method
Explain your code to an inanimate object.
When you’re stuck, explain your code line-by-line to a rubber duck (or any object). The act of explaining often reveals the bug because it forces you to articulate your assumptions.
Why it works: We often make unconscious assumptions when reading our own code. Explaining it out loud makes those assumptions explicit, revealing logical errors.
Tip 2: Take Breaks
Step away when you’re stuck.
If you’ve been debugging for more than an hour without progress, take a 10-15 minute break. Walk around, get coffee, or work on something else.
Why it works: Your brain continues processing in the background. Many developers report suddenly seeing the solution after stepping away from the problem.
Tip 3: Version Control Time Travel
Use git to find when the bug appeared.
Use git bisect to binary search through commits and find exactly when a bug was introduced:
1
2
3
4
5
git bisect start
git bisect bad          # Current version has the bug
git bisect good v1.2.3  # This older version worked
# Git will check out middle commit for testing
# Mark each commit as good or bad until you find the culprit
Why it works: Seeing what changed when the bug appeared often makes the cause obvious.
Tip 4: Simplify Your Test Case
Create the minimal reproducible example.
Take the bug and strip away everything unrelated until you have the simplest possible code that demonstrates the problem.
Example: Instead of running your entire application, create a small test method with just the buggy logic.
Why it works: Removing complexity helps you focus on the essential problem and makes the cause more apparent.
Pro Tip: Keep a debugging journal. When you solve a tricky bug, write down what caused it and how you found it. Future-you will thank present-you!
Tools Summary
Here’s a quick reference of debugging tools and when to use them:
| Tool | Best For | Example Use Case |
|---|---|---|
| IDE Debugger | Complex logic, following execution flow | Understanding how a sorting algorithm works |
| Logging | Production issues, long-running processes | Tracking down why a batch job fails occasionally |
| Unit Tests | Verifying fixes, preventing regressions | Ensuring your fix doesn’t break other functionality |
| Print Debugging | Quick checks, simple issues | Verifying a variable has the expected value |
| Stack Traces | Exceptions, crashes | Finding where a NullPointerException originated |
| Profiler | Performance issues | Identifying which method is slow |
| Git Bisect | Finding when a bug was introduced | Determining which commit broke a feature |
Key Takeaways
Effective troubleshooting is a learnable skill that improves with practice. Remember these fundamental principles:
- Be systematic: Follow the reproduce → isolate → fix → verify cycle
- Use the right tools: Learn your IDE’s debugger, it’s your most powerful weapon
- Read error messages carefully: They contain valuable clues
- Form hypotheses: Don’t make random changes, test specific theories
- Verify your fix: Ensure the bug is actually fixed and nothing else broke
- Learn from bugs: Document what you learned for future reference
- Ask for help: After 30 minutes of being stuck, reach out to colleagues
- Stay calm: Frustration clouds judgment; take breaks when needed
Every bug you fix teaches you something new about how systems work. Embrace debugging as a learning opportunity, not a frustrating obstacle!
Conclusion
Troubleshooting is more than just fixing bugs, it’s about developing a systematic, scientific approach to problem-solving. The skills you build debugging code will serve you throughout your career, from finding simple null pointer exceptions to diagnosing complex distributed system failures.
As a junior developer, focus on building good debugging habits early:
- Always reproduce issues before attempting fixes
- Use debugger breakpoints instead of just print statements
- Read error messages and stack traces carefully
- Write tests to prevent regressions
- Document what you learn from each bug
The difference between a junior developer and a senior developer often isn’t that seniors write bug-free code, it’s that they can find and fix bugs much more quickly and systematically.
Next steps: Start practicing these techniques today. The next time you encounter a bug, resist the urge to make random changes. Instead, follow the systematic approach outlined in this guide. Your future self will thank you!
Reference: This guide was informed by industry best practices and TechTarget’s troubleshooting methodology, adapted specifically for software development contexts.