
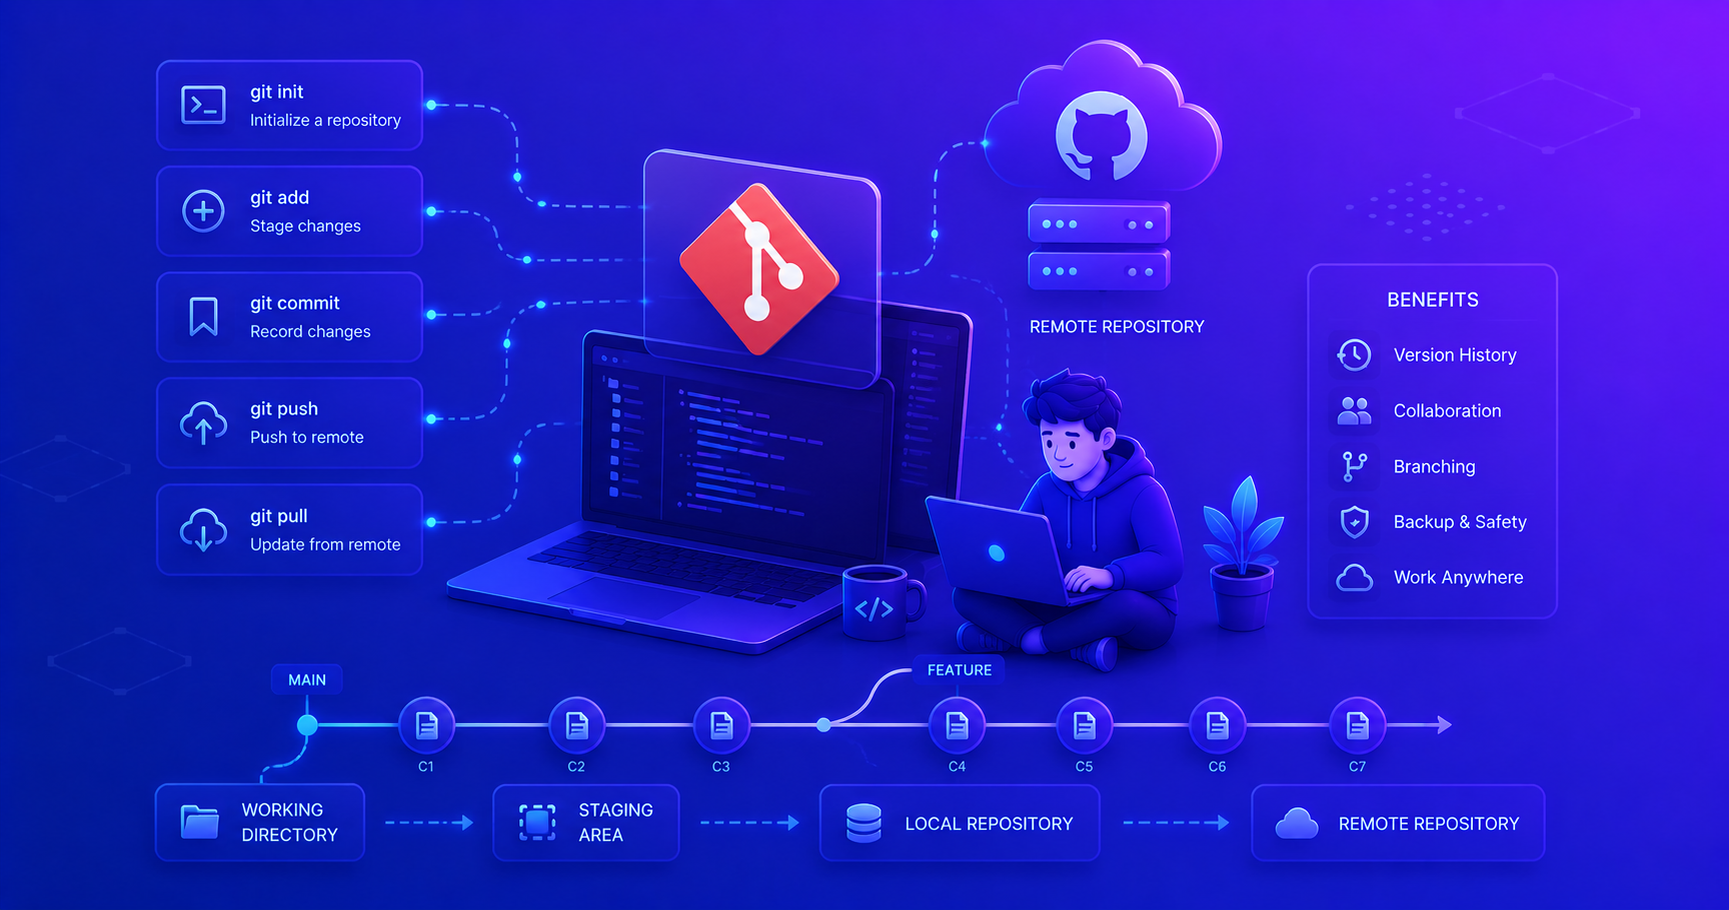
This post introduces GIT version control system. Understanding GIT is essential for modern software development and team collaboration!
What Is GIT and Why Version Control Matters
Imagine working on a complex programming assignment and accidentally deleting a crucial function. Or picture multiple developers trying to edit the same file simultaneously without overwriting each other’s work. This is where version control becomes essential.
GIT is a distributed version control system that tracks changes to your code over time. Created by Linus Torvalds in 2005, GIT has become the industry standard for managing source code. It allows you to:
- Track every change made to your codebase with complete history
- Collaborate seamlessly with multiple developers on the same project
- Experiment safely by creating branches without affecting stable code
- Revert mistakes by rolling back to previous working versions
- Review changes before integrating them into the main codebase
Pro Tip: Learning GIT is not optional in modern software development, it’s a fundamental skill that every employer expects!
Core GIT Concepts
Before diving into commands, let’s understand the fundamental concepts that make GIT work.
Repository (Repo)
A repository is a directory where GIT tracks all your project files and their complete history. Think of it as a project folder with superpowers, it remembers every version of every file.
- Local Repository: Lives on your computer
- Remote Repository: Hosted on platforms like GitHub, GitLab, or Bitbucket
Working Directory, Staging Area, and Repository
GIT’s three-stage architecture.
GIT uses three main areas to manage your code:
- Working Directory: Where you edit files normally
- Staging Area (Index): Where you prepare changes for commit
- Repository: Where GIT permanently stores committed changes
This three-stage process gives you fine control over what gets saved in your history.
Commit
A commit is a snapshot of your project at a specific point in time. Each commit contains:
- Changes made to files
- A unique identifier (SHA hash)
- Author information
- Timestamp
- A descriptive message explaining the changes
Think of commits as save points in a video game, you can always return to them if needed.
Branch
A branch is an independent line of development. Branches allow you to work on new features or bug fixes without affecting the main codebase.
gitGraph
    commit id: "Initial commit"
    commit id: "Add user model"
    branch feature-login
    commit id: "Create login form"
    commit id: "Add validation"
    checkout main
    commit id: "Fix bug in dashboard"
    checkout feature-login
    commit id: "Implement authentication"
    checkout main
    merge feature-login
    commit id: "Deploy v1.0"
Merge
Merging combines changes from different branches. When you finish working on a feature branch, you merge it back into the main branch.
Setting Up GIT
Initial Configuration
After installing GIT, configure your identity (this information appears in every commit):
1
2
3
4
5
6
7
8
# Set your name
git config --global user.name "Your Name"

# Set your email
git config --global user.email "your.email@example.com"

# Verify configuration
git config --list
Warning: Use the same email address you’ll use for GitHub/GitLab to ensure your commits are properly attributed!
Essential GIT Commands
Let’s explore the commands you’ll use every day as a developer.
Starting a Repository
| Command | Purpose | When to Use |
|---|---|---|
git init | Create a new repository in current directory | Starting a new project from scratch |
git clone <url> | Copy an existing repository | Joining an existing project |
1
2
3
4
5
6
# Create a new repository
git init my-project
cd my-project

# Clone an existing repository
git clone https://github.com/username/project.git
Basic Workflow Commands
The typical daily workflow follows this pattern:
flowchart LR
    A[Edit Files] --> B[Stage Changes]
    B --> C[Commit Changes]
    C --> D[Push to Remote]

    style A fill:#e1f5ff
    style B fill:#fff3e0
    style C fill:#f3e5f5
    style D fill:#e8f5e9
1. Check Status
Always check what’s changed before staging:
1
2
# See which files are modified, staged, or untracked
git status
2. Stage Changes
Add files to the staging area:
1
2
3
4
5
6
7
8
# Stage a specific file
git add filename.java

# Stage all changed files in current directory
git add .

# Stage all changes in the repository
git add -A
Pro Tip: Use
git add -pfor interactive staging, it lets you review and stage changes in chunks!
3. Commit Changes
Save your staged changes with a descriptive message:
1
2
3
4
5
# Commit with a message
git commit -m "Add user authentication feature"

# Commit with detailed message (opens editor)
git commit
4. Push to Remote
Upload your commits to the remote repository:
1
2
3
4
5
# Push to the remote repository
git push origin main

# Push and set upstream branch
git push -u origin feature-branch
5. Pull from Remote
Download and integrate changes from the remote repository:
1
2
3
4
5
# Fetch and merge changes from remote
git pull origin main

# Pull from tracked branch
git pull
Working with Branches
Branches are essential for organized development:
1
2
3
4
5
6
7
8
9
10
11
12
13
14
15
16
17
# List all branches (* marks current branch)
git branch

# Create a new branch
git branch feature-name

# Switch to a branch
git checkout feature-name

# Create and switch to a new branch (shortcut)
git checkout -b feature-name

# Delete a branch (after merging)
git branch -d feature-name

# Force delete a branch
git branch -D feature-name
Merging Branches
1
2
3
4
5
# Switch to the branch you want to merge INTO
git checkout main

# Merge another branch into current branch
git merge feature-name
gitGraph
    commit id: "A"
    commit id: "B"
    branch feature
    commit id: "C"
    commit id: "D"
    checkout main
    commit id: "E"
    merge feature
    commit id: "F"
Branching Strategies for Beginners
As a junior developer, you’ll typically work with these common branching patterns:
Feature Branch Workflow
The most straightforward strategy for teams:
mainbranch contains production-ready code- Create a feature branch for each new feature or bug fix
- Merge feature branches back to
mainwhen complete
flowchart TB
    main["main branch<br/>(production code)"]
    feature1["feature/user-login"]
    feature2["feature/dashboard"]

    main --> feature1
    main --> feature2
    feature1 --> |merge| main
    feature2 --> |merge| main
Naming Conventions
Use clear, descriptive branch names:
- Features:
feature/login-page,feature/user-profile - Bug fixes:
bugfix/header-alignment,fix/login-error - Hotfixes:
hotfix/security-patch
Warning: Avoid generic names like
test,temp, ormy-branch. Future you (and your teammates) will thank you!
Handling Merge Conflicts
A merge conflict occurs when GIT can’t automatically merge changes because the same lines were modified in different branches.
Conflict Example
When you try to merge and encounter a conflict:
1
2
3
4
5
6
git merge feature-branch

# Output:
# Auto-merging src/User.java
# CONFLICT (content): Merge conflict in src/User.java
# Automatic merge failed; fix conflicts and then commit the result.
Conflict Markers
GIT marks conflicts in your files:
1
2
3
4
5
6
7
public class User {
    <<<<<<< HEAD
    private String username;
    =======
    private String userName;
    >>>>>>> feature-branch
}
<<<<<<< HEAD: Your current branch’s version=======: Separator>>>>>>> feature-branch: Incoming branch’s version
Resolving Conflicts
- Open the conflicted file
- Choose which changes to keep (or combine both)
- Remove conflict markers
- Stage the resolved file:
git add filename.java - Complete the merge:
git commit
1
2
3
4
// After resolving - keep the version you want
public class User {
    private String username;  // Decided to use this version
}
Pro Tip: Use a merge tool like
git mergetoolor IDE integrations (IntelliJ, VSCode) for easier conflict resolution!
Best Practices for Commit Messages
Good commit messages are crucial for understanding project history. Follow these guidelines:
The Commit Message Structure
1
2
3
4
5
6
7
Short summary (50 chars or less)

Detailed explanation of what and why, not how.
Wrap at 72 characters. Include ticket numbers if applicable.

- Bullet points are okay
- Use present tense: "Add feature" not "Added feature"
Good vs Bad Examples
| ❌ Bad | ✅ Good |
|---|---|
fix bug | Fix null pointer exception in user login |
update code | Refactor authentication to use JWT tokens |
stuff | Add input validation for email field |
WIP | Implement first draft of payment processing |
The Seven Rules
- Separate subject from body with a blank line
- Limit subject line to 50 characters
- Capitalize the subject line
- Don’t end subject line with a period
- Use imperative mood (“Add feature” not “Adds feature”)
- Wrap body at 72 characters
- Explain what and why, not how
1
2
3
4
5
6
7
8
# Good commit example
git commit -m "Add email validation to registration form

Implements regex-based validation to ensure users enter valid
email addresses. This prevents invalid data from reaching the
database and improves user experience with immediate feedback.

Fixes #123"
Common Mistakes and How to Avoid Them
Mistake 1: Committing Sensitive Data
❌ Don’t: Commit passwords, API keys, or credentials
1
2
3
4
5
# Use .gitignore to exclude sensitive files
echo "config/secrets.yml" >> .gitignore
echo ".env" >> .gitignore
git add .gitignore
git commit -m "Add gitignore for sensitive files"
Danger: If you accidentally commit secrets, simply removing them in a later commit doesn’t delete them from history! Use tools like
git-filter-repoto scrub history.
Mistake 2: Making Commits Too Large
❌ Don’t: Commit multiple unrelated changes together
✅ Do: Make small, focused commits that address one thing
1
2
3
4
5
6
7
8
9
10
# Instead of:
git add .
git commit -m "Fixed everything"

# Do this:
git add User.java
git commit -m "Add email validation to User model"

git add LoginController.java
git commit -m "Implement login rate limiting"
Mistake 3: Working Directly on Main
❌ Don’t: Make changes directly on the main branch
✅ Do: Always create a feature branch
1
2
3
4
5
6
7
8
# Correct workflow
git checkout main
git pull origin main
git checkout -b feature/new-feature
# Make your changes
git add .
git commit -m "Implement new feature"
git push -u origin feature/new-feature
Mistake 4: Not Pulling Before Pushing
❌ Don’t: Push without pulling latest changes
✅ Do: Always pull before starting work and before pushing
1
2
3
4
5
6
7
8
9
10
# Best practice
git checkout main
git pull origin main
git checkout -b feature/my-feature
# ... do your work ...
git checkout main
git pull origin main
git checkout feature/my-feature
git merge main  # Integrate latest changes
git push -u origin feature/my-feature
Advanced Topics
Interactive Rebase
clean up commit history before merging.
Rebasing rewrites commit history. Use it to:
- Combine multiple commits into one
- Reorder commits
- Edit commit messages
1
2
# Rebase last 3 commits
git rebase -i HEAD~3
When to use: Before merging a feature branch to clean up messy commit history.
Warning: Never rebase commits that have been pushed to a shared branch!
Git Stash
temporarily save changes without committing.
Stashing is useful when you need to switch branches but aren’t ready to commit:
1
2
3
4
5
6
7
8
9
10
11
12
13
14
# Save current changes
git stash

# List stashed changes
git stash list

# Apply most recent stash
git stash apply

# Apply and remove stash
git stash pop

# Stash with a message
git stash save "WIP: refactoring user service"
Use case: You’re working on a feature when a critical bug needs immediate attention. Stash your changes, fix the bug, then return to your feature.
Cherry-Pick
apply specific commits from one branch to another.
Cherry-picking copies a commit from one branch to another:
1
2
3
4
5
# Get the commit hash
git log

# Apply specific commit to current branch
git cherry-pick abc1234
Use case: You made a bug fix on the wrong branch and need to apply it to the correct branch without merging everything.
Daily GIT Workflow Cheat Sheet
Here’s a typical day in the life of a developer using GIT:
1
2
3
4
5
6
7
8
9
10
11
12
13
14
15
16
17
18
19
20
21
22
23
24
25
26
27
28
29
30
31
32
33
34
35
36
37
38
# Morning: Start your day
git checkout main
git pull origin main

# Create a feature branch
git checkout -b feature/user-profile

# Work on your code...
# ... editing files ...

# Check what changed
git status
git diff

# Stage and commit changes
git add src/UserProfile.java
git commit -m "Add user profile page layout"

# Continue working...
# ... more changes ...

git add src/UserProfile.java src/ProfileController.java
git commit -m "Implement profile edit functionality"

# Before pushing, sync with remote
git checkout main
git pull origin main
git checkout feature/user-profile
git merge main

# Resolve any conflicts if they occur
# ... conflict resolution ...

# Push your feature branch
git push -u origin feature/user-profile

# Create pull request on GitHub/GitLab (via web interface)
# After review and approval, merge via platform
Quick Reference Table
| Task | Command |
|---|---|
| Initialize repo | git init |
| Clone repository | git clone <url> |
| Check status | git status |
| Stage file | git add <file> |
| Stage all changes | git add . |
| Commit changes | git commit -m "message" |
| Push to remote | git push origin <branch> |
| Pull from remote | git pull origin <branch> |
| Create branch | git branch <name> |
| Switch branch | git checkout <branch> |
| Create + switch branch | git checkout -b <branch> |
| Merge branch | git merge <branch> |
| View commit history | git log |
| View commit history (compact) | git log --oneline |
| Discard changes to file | git checkout -- <file> |
| Undo last commit (keep changes) | git reset --soft HEAD~1 |
| View remote repositories | git remote -v |
Useful GIT Commands for Troubleshooting
1
2
3
4
5
6
7
8
9
10
11
12
13
14
15
16
17
18
19
20
# View commit history
git log --oneline --graph --all

# See what changed in a commit
git show <commit-hash>

# Compare branches
git diff main..feature-branch

# See who changed each line of a file
git blame filename.java

# Undo last commit but keep changes staged
git reset --soft HEAD~1

# Undo last commit and unstage changes
git reset HEAD~1

# Discard all local changes (dangerous!)
git reset --hard HEAD
Warning:
git reset --hardpermanently deletes uncommitted changes. Use with extreme caution!
Learning Resources
To continue improving your GIT skills:
- Practice: Use GIT for all your personal projects
- Visualize: Use tools like
git log --graphor GitKraken to see branch structures - Experiment: Create a test repository to try commands safely
- Read documentation:
git help <command>or visit git-scm.com
Pro Tip: Learn to read
git logoutput and understand your project’s history. It’s like being a code detective!
Conclusion
GIT is an essential tool in modern software development. You’ve learned:
✅ Core concepts: repositories, commits, branches, and merges
✅ Essential commands for daily development workflow
✅ Branching strategies and naming conventions
✅ How to handle merge conflicts confidently
✅ Best practices for commit messages
✅ Common mistakes and how to avoid them
✅ Advanced features like rebase, stash, and cherry-pick
The key to mastering GIT is consistent practice. Start using it for every project, even personal ones. Make small, frequent commits with clear messages. Create branches for new features. You’ll quickly build the muscle memory that makes GIT second nature.
Remember: everyone makes mistakes with GIT when learning. The difference between junior and senior developers isn’t whether they encounter issues, it’s how confidently they resolve them!
"The best way to learn GIT is to use it daily and don't be afraid to experiment in a test repository. Every senior developer has accidentally deleted branches or created merge conflicts. What matters is learning how to fix them!"
Happy committing! 🚀